Of all the spaces and/or items in one’s home, craft rooms and their supplies are notorious for becoming disorganized.
And it’s easy to understand why.
We love crafting and a lot of it includes cutting.
Some crafts also include hundreds of types of tools to use in different shapes and colors.
Then we add in beads, buttons, ribbons, etc. (Cue the circus music).
Disclosure: Some of the links below are affiliate links that I have provided for your convenience. Click here to read my full disclosure policy.
When it comes to organizing your craft space and supplies, the most important step will be to create a habit to prevent clutter from happening again.
Decluttering and organizing is actually the easy part.
Maintaining a clean workspace for your crafting needs is where most people have trouble.
So, let’s see if we can get your space cleaned up and set up an easy plan to keep it clutter-free.
Taking Inventory
Start with Yourself
The first thing you want to ask yourself is what crafts are you absolutely really into.
In my early days, I tried several different crafts and ended up with unfinished projects that took up space because I thought I might try them again later.
I had to learn that being a crafter didn’t mean I had to have my hand in everything.
Now, this doesn’t mean you shouldn’t try something new in the future.
But if you find that something doesn’t suit you, then know it’s okay to let it go.
And with that, make a list of your crafts, the ones you intend on doing when your space and things are finally organized. Hold onto that list for later.
Location
Next, take inventory of your craft room or space.
You’ll want to take measurements of the room or space and note things like windows, doors, shelves, lighting, closets, and even outlets.
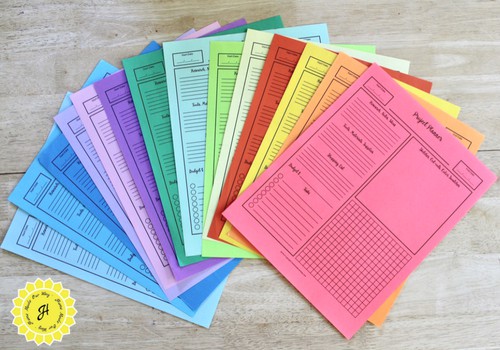
If you prefer, you can use our project planner to help you with this space. Click here to get this free printable.
Craft Supplies
This part may be a bit time-consuming but make a quick inventory of all the crafting items you intend to keep.
This includes machines, tools, fabrics, paints, papers, beads, ribbons, and other notions.
If it’s a lot, then just list the category instead like cutting supplies or glues.
Declutter Time
This next part deals with letting things go.
Don’t feel bad about this part.
For us crafters, we like to think that we can nail anything crafty but that isn’t always the case.
For me, this was knitting.
I have always been a crocheter and then I decided to try knitting.
I mean, it’s like crocheting except without the
After a few attempts, I gave up.
I just couldn’t get past not having the
I had to let it go.
I was lucky in that I didn’t have to get rid of the yarn but the needles had to go.

Now, it’s your turn.
You’ll need your list of crafts you plan on continuing to do.
This will keep you from second-guessing what items you should or should not keep.
Stick to your list.
Find a box and start filling it with unfinished projects and any tools, machines, patterns, or instructional books that come with it.
Once you are done, do not toss it out.
Consider donating any usable items.
Places you can donate include senior living homes, schools, and even hospitals where volunteers make blankets and caps for newborns.
Sorting
Hopefully, you are left with only those crafting items you intend to use on a regular basis.
Begin sorting items into categories.
Create a space for each category such as paints, glues, cutting tools, Cricut gear, coloring pencils, needlework needles, fabric, paper, stamps, etc.
This will give you an idea of how much you have as well as what type of organizer you may need.
As you sort through individual items, take the opportunity to make sure these items are up to par.
Check to see if any paints or glues are still good.
Many dry up after a while.
See if any tools need sharpening.
Make a list of those that may need replacing soon.
Setting Up
Before placing and storing all your crafting supplies, the next step in this process involves setting up your craft room or craft space to make it as functional as possible.
There are three things you need to consider and you should work on their planning simultaneously.
Main Craft Workspace
If you have an entire room just for your crafts, consider placing your main workstation in the center of your room.
By placing your worktable in the middle, you are able to move freely around your work instead of having to move the work itself.
And, if the room’s dimensions allow it, you can create a bigger worktable especially if your crafting requires a large working area.
Centralizing your workstation will also free up wall space for other organizers and shelving.
If you don’t have the space to do this and have to place your desk against a wall, consider making an “L-shape” workspace.
This will give you a little more workspace as well as allow you to move around your station.
Machine Placement
If your crafting requires the constant use of a machine such as a Cricut or sewing machine, make sure it has the best access to an outlet.
You don’t want your craft area decorated with extension cords.
This may mean storing your machine on a table against a wall instead of in your centralized workspace.
Choose what works best for you.
If you don’t mind storing your machine when you are done for the day, then do so.
However, if you do choose to keep it in a centralized area where you don’t have great access to an outlet, then be very careful that you don’t trip on any cords while you work.
You can try duct-taping them down onto the floor or covering them with a rug.
Paint your cords to make them even more visible if need be.
And, when not in use, unplug your machine then roll up and secure the cord.
Lighting
The next thing you want to take into consideration is lighting.
Lighting is very crucial to crafting since crafts usually involve the coloring of items and small details.
Again, note where your outlets are located and make a plan to add the type of lighting you need and where it should be placed.
Lighting can include portable lamps with magnification, and recessed lighting, and if possible, try to use LED-equipped lighting.
Try to place your workstation directly under any overhead lighting (most are located in the center of the ceiling).
Storing and Organizing
Furniture, Shelving, and Pegboard
Other than your main workstation, you will want to place any furniture, like a shelving unit, up against a wall so as not to disrupt the flow of your work area.
Take advantage of vertical space and stack similar pieces like bookshelves on top of each other.
Just make sure to secure them in place.
Have an organizer that rests flat on the floor?
Consider raising it by adding legs or casters.
This will give you additional space under it for items you don’t use as often.
If you have the wall space, install a pegboard to hold your most frequently used tools and items.
This will save you some time when looking for things that you may otherwise keep in drawers.
It also makes end-of-the-day clean-up easy when returning your items where they belong.
Bins, Baskets, and Jars
Once you have your main pieces where they belong, it’s time to, store and organize all your items.
What you store your items in is ultimately up to you.
For some of you function over form is what drives your productivity.
For others, both are equally important.
If you have the means to do so, you can find all kinds of craft room organizers especially made for your craft.
These can be pricey and that is why I don’t encourage you to buy any until you get to this part of the organization process.
You don’t want to overspend before you declutter.
Also, avoid the pink tax and look into home improvement stores like Lowe’s or Home Depot.
They carry lots of toolboxes and small item organizers that may actually be cheaper than the same items in an Arts & Crafts store.
Just spray paint the items in your favorite color if you don’t want them to look so industrial.
If you don’t have the budget for craft room organizers, don’t sweat it.
There are plenty of items around the home to accommodate your items.
You can use glass jars for colorful notions like buttons, beads, and even washi tape.
Get crafty and turn a shoebox into a one-of-a-kind bin.
Empty tin cans are great for holding paintbrushes.
Again, I don’t have to tell you to get crafty.
You know what to do.
Storing Your Craft Items
When it comes to your frequently used tools and item, you will want to keep these close to your workstation.
If your workspace does not have a place for drawers or shelving, then consider using a portable caddy or cart.
Just make sure to designate a place to ‘park’ your caddy when you are done at the end of the day.
For seasonal items, consider storing these above your furniture pieces or at least, on the high shelves, when not in season.
Heavy machinery should be stored on lower shelves.
Labeling
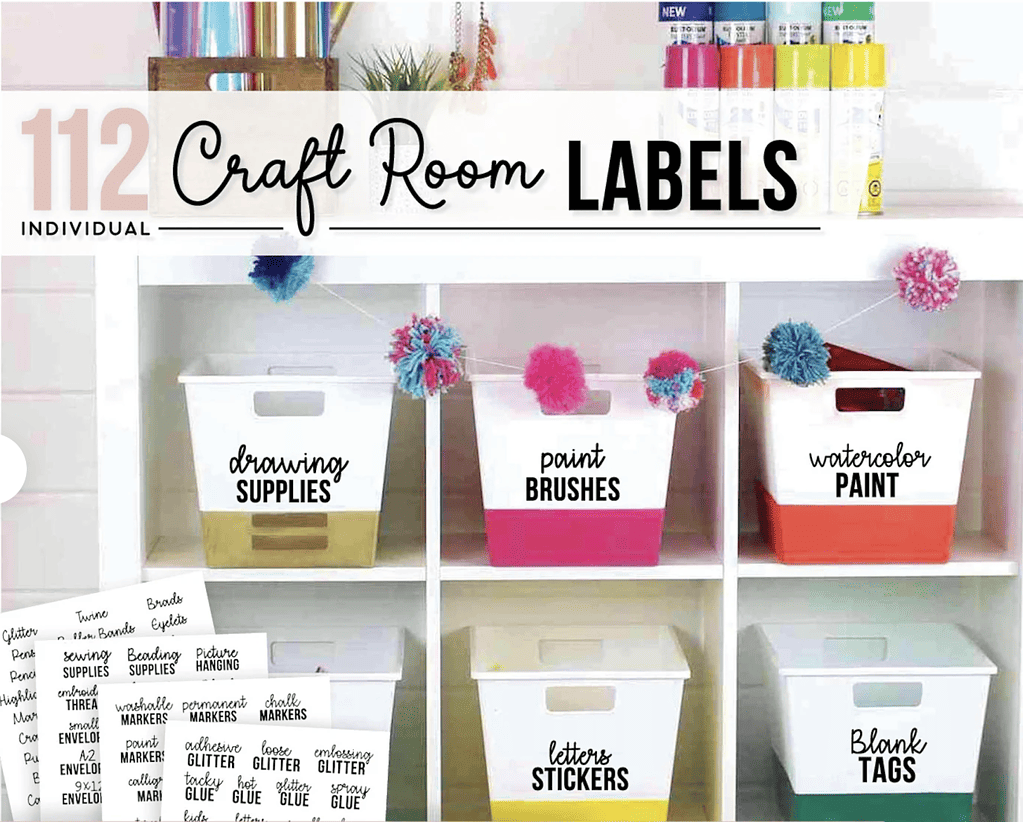
Once you have everything sorted into bins (especially those that you can’t see easily into), make sure to label them.
Again, this is not only a time saver but it will make everything look nice as well.
Don’t forget to also label drawers and shelves even if you can see the item(s).
Having everything labeled will make it easier when putting items back.
There’s no second-guessing where you took your item from.
Also, if you share your space with another crafter, they will know where to return items.
This can also be a handy reminder if you’ve lent an item out.
Maintaining Your Craft Space
Lastly, here are some things to do to prevent a craft room pile-up.
First, keep a large trash can near your work area.
You may think you only need a small one but you will soon realize that crafting can create bigger-than-expected messes.
At the end of the day, make sure to put everything back where it belongs.
Try not to waffle on this.
Even if you are going to be working in your room first thing in the morning, it’s so much nicer walking into a clean-slate room.
Every couple of years, go through any craft pattern booklets and magazines and purge any you have not worked on.
Again, don’t toss away anything.
Donate to schools and senior living communities.
Let’s Get Started
If you are ready, let’s get started on creating the craft room of your dreams.
Do you have a basement you’d like to turn into your craft room? Click here to read how you can declutter and organize your basement before turning it into a functional room.



Leave a Reply