Don’t you hate trying to find an ingredient in your pantry because, well, it’s a disaster?
How about buying an item only to find more of it hidden or stashed under piles of stuff in your pantry?
If this is you, then let’s see if we can do something about that.
Let’s organize your pantry so you can stop wasting food, time, and money.
Disclosure: Some of the links below are affiliate links I provided for your convenience. Click here to read my full disclosure policy.
Organize Your Pantry
The following steps should be followed whether you have a small pantry or a large walk-in type.
However, I will go over some tips for each at the end to help you make the most of this space.
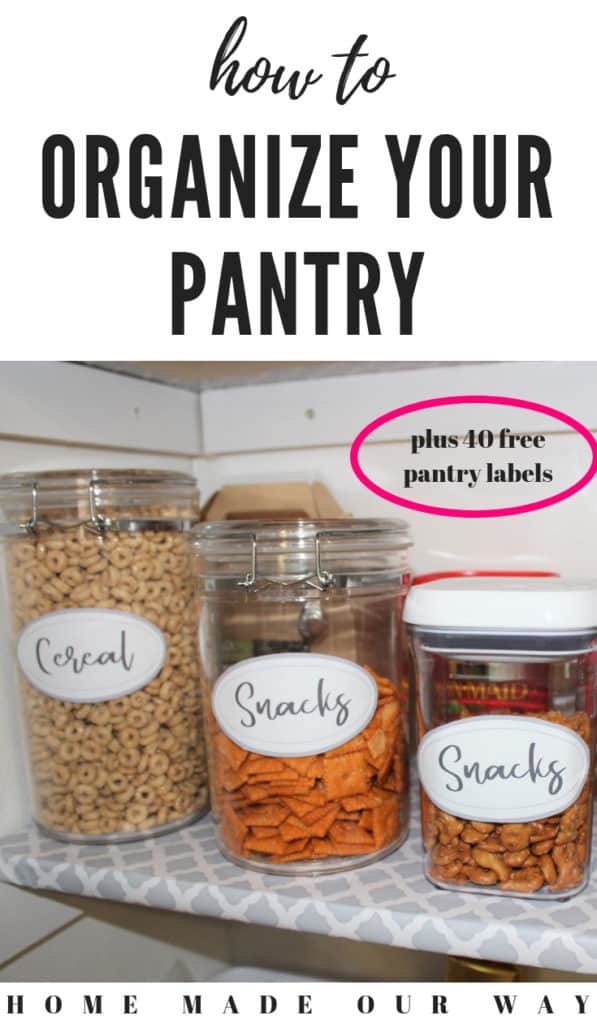
I’ve also created pantry labels you can use as you organize your foods [scroll to the end of the post to access them].
These are free and located in our resource library. Click the link above to get access.
Empty your Pantry
Go ahead and start emptying your pantry.
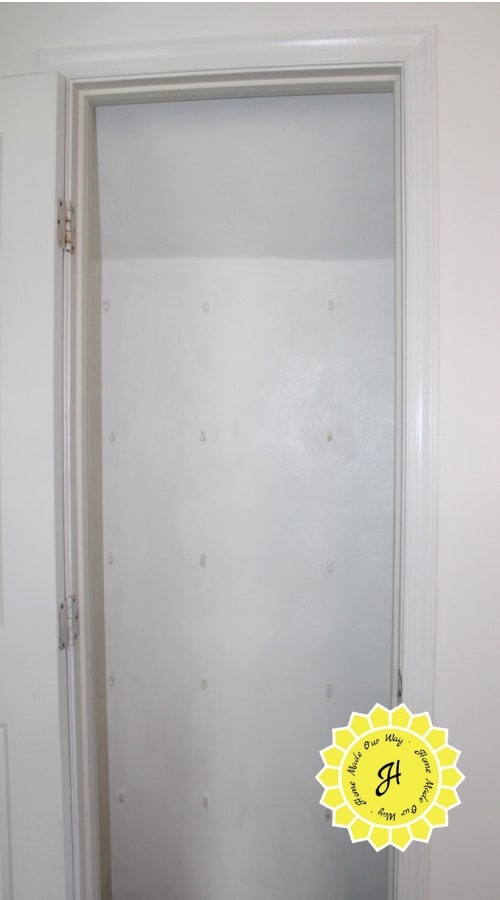
For this post, I chose to redo my pantry.
I emptied it and removed the wire shelving.
I opted to put in wooden shelves.
As you empty your pantry, try to group similar items together, such as baking needs, snacks, beverages, etc.
Toss out anything that has expired or looks as if it has.
Go through boxed items and check to see if it has been opened.
If the inner liner wasn’t sealed correctly, toss it out.
Too many times, my kids have opened a box of crackers or cereal and forgotten to fold over the inner liner, causing it to go stale.
Now, if you have items you ‘thought’ you would use, consider donating them if they have not expired.
Every once in a while, I get a free item.
If it is something my family normally does not consume, then I put it in a bag I keep for food bank donations.
Clean Your Pantry
After emptying the pantry, go ahead and give it a good cleaning.
First, vacuum any crumbs and other debris.
Then, clean and wipe down any shelving.
For wooden shelves, wipe down any sticky messes and consider lining them if they are not lined.
This will make it easy to wipe it down in the future.
If you have wire shelving, spray it with a cleaner. (I use a homemade cleaner made with 1 cup of hot water, 1/2 cup of vinegar, and a teaspoon of Castille soap.)
Lay a towel on the floor, and starting from the top, spray the shelves, then wipe them down.
For extra sticky messes, use a toothbrush to get in between wires.
Assessing Your Pantry Foods
Take a look at what you have left.
Hopefully, you already have these grouped into categories.
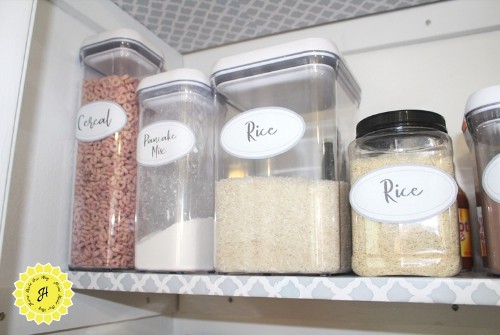
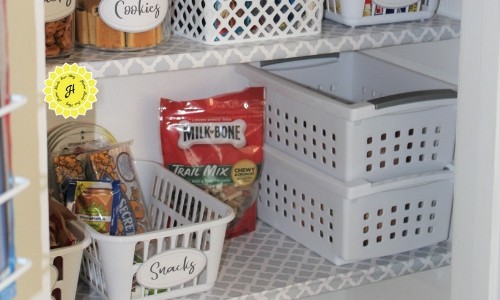
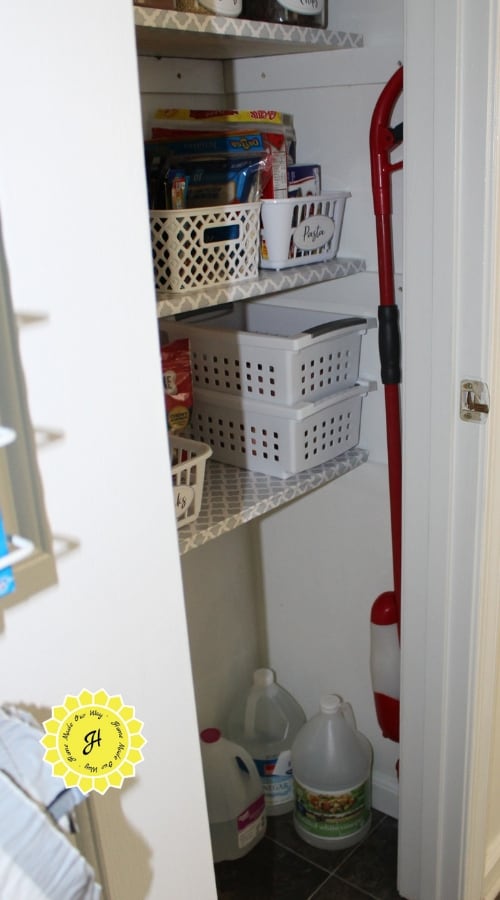
Determine if you need bins, canisters, jars, or baskets for your items.
If you have these things handy, then go ahead and transfer your food items into them.
Note that not everything needs to be taken out of its original packaging.
Items I may transfer to bins are those my children get into, such as cereal.
These items are hard to keep fresh if they forget to properly close the inner liner.
The same goes for cookies and crackers that do not come in sealable packaging.
If your home is prone to getting occasional visits from small critters, then, by all means, put your food items like flour and chips in canisters and jars to keep them out.
Assessing Your Pantry
Take a look at your empty pantry and consider where you will place your items.
You’ll want to make sure that you can see everything when you are done arranging your stuff.
Consider putting rarely used items high and often used items at around eye level and down.
Depending on the age of your child, you want to keep their stuff reachable.
If you have a deep reach-in pantry, try arranging your items up against the wall as much as possible in a U-shape pattern.
This will allow you to reach in easily instead of pushing items out of your way to get to something, and it keeps everything visible.
Consider moving shelving if necessary.
My pantry’s tallest
On top of that, the ceiling sloped down as well. So I shortened the height of this
Now, my tallest
I also removed the lower
Other things to consider:
- add wallpaper to make your pantry pop
- paint your pantry white to brighten up the space (if you have no lighting)
- add lighting if it is dim
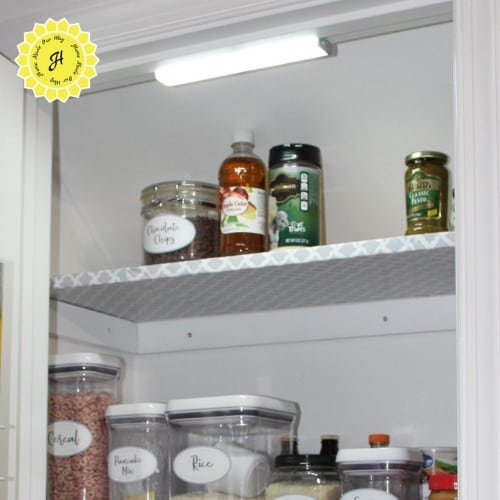
I also lined my wooden shelves with contact paper so that I could easily wipe them down.
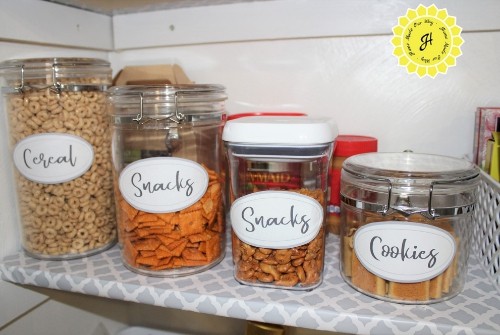
Label Your Bins
As you start to place items back into the pantry, consider labeling your bins.
This will keep you, but mostly others, from placing items anywhere.
Click here –> for beautiful labels for jars and other pantry storage containers.
Make it a no-excuses zone.
When you are done with your pantry, go over it with family members.
Show them where things go and don’t go.
The Reveal

Large Pantries
If you are lucky to have a large pantry, consider using your space to help keep your kitchen from looking cluttered.
- place heavy appliances like a mixer on lower shelves
- dedicate a
shelf for cookbooks - consider placing your recycling bins here, too
Small Pantries
I tried to optimize every inch of my small pantry.
Here are some things I did.
Add an over-the-door organizer here to hold more items.
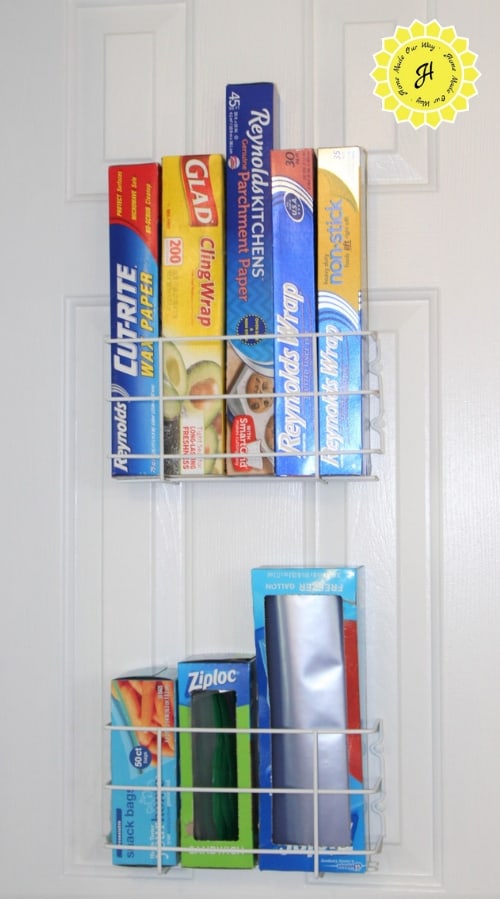
Try attaching a magazine holder to the door and use it to hold things like foils, wraps, and even boxed spaghetti.
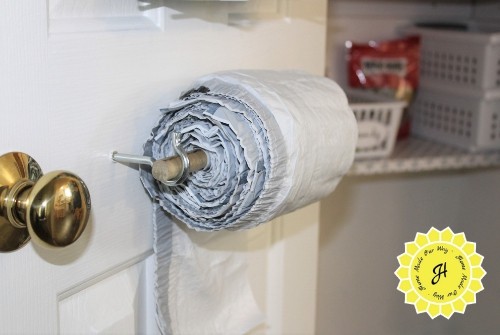
Below, I added hooks and a dowel to the door to hold my garbage bags.
I also added hooks just inside the door on both sides of the pantry.
Now I have a place for my broom and mop.

You can also take advantage of space under shelves with these under-the-shelf organizers.
More Tips
For more clever ideas, check out Pinterest.
There are countless ways to optimize your pantry space, including using a hanger to clip your chips to using fishbowls for kids’ snacks.
I hope these steps help you get the clean and organized pantry you need and want.
Free Pantry Labels
Click the pink button below to access your free pantry labels.
For more organization in the kitchen:

Leave a Reply