Organize Your Computer Desktop Screen
Is your computer monitor’s screen full of files, folders, and icons in no particular order?
Is your computer’s cyber storage almost at capacity?
Then you’ll need to declutter and organize your computer desktop items.
Let’s see if we can clean up your screen and get rid of files that are eating up your computer’s storage.
In this post, I’ll also show a couple of ways you can organize your digital files.

Disclosure: This post contains some affiliate links for your convenience (which means if you purchase after clicking a link, I will earn a small commission, but it won’t cost you a penny more)! Click here to read my full disclosure policy.
The following steps were done on a Mac but can easily be done on a Windows computer.
Inventory Your Desktop
Take Notes
The first thing you want to do is make a list of the files, folders, and other items you have on your desktop.
This step may take a while if you have a lot of these items.
If you find any items or files you no longer need or want as you create your list, go ahead and put these into your computer’s trash bin.
Sort into Categories
Looking at your list, begin sorting the items into categories.
Categories can include but are not limited to:
- Work files
- School files
- Personal files
- Photos
- Projects
If your list is big, I suggest using different colored highlighters for each of your categories.

Create Category Folders
After you have finished sorting your items, go ahead and create a desktop folder for each of the categories you made in the last step.
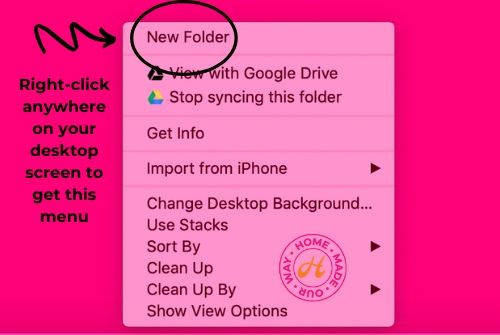
To do this, simply right-click on your desktop and this should bring up a menu.
Then select “new folder.”
This option is usually the first one on the menu.
Next, you’ll want to right-click this folder and choose “rename” from the menu that appears.
Rename it for one of your categories.
Repeat these steps for every category you have.
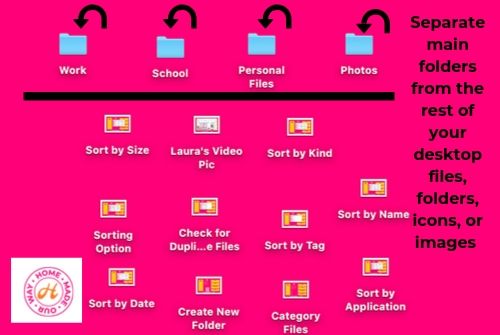
If you have space on your desktop, place each of the category files in a special location separate from all your items.
Move Your Files
To help clear your desktop, begin moving files, folders, and other items into the category folders you have created.
Refer to the list you created earlier.
When you are done, your desktop should have only those category folders you created.
Declutter and Purge
Create a System
Next, you’ll want to create a system for going through each of your folders’ items so that you can begin purging your files of cyber garbage.
For example, you may want to tackle the folder with the most files first.
If this is the case, then order your category files on your desktop accordingly.
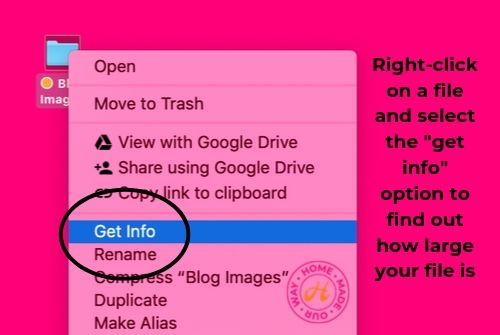
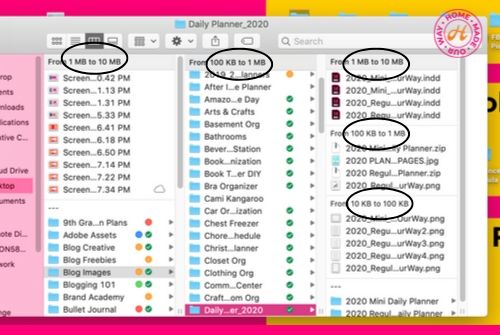
If you are unsure which of your category folders has the most information, simply right-click on the folder and look for the “get info” option.
Here, you should find out how many bytes your folder contains.
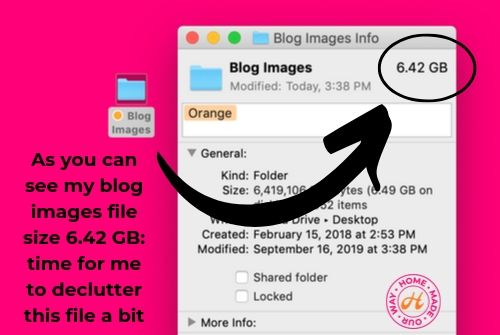
In case you’re like me and can’t remember which abbreviated byte size is bigger, here is that information:
- KB – kilobyte = 1024 bytes
- MB – megabyte = 1,048,576 bytes
- GB – gigabyte = 1,073,741, 824 bytes
You can also choose to start with the folder with the least amount of information or perhaps do them in alphabetical order.
Again, pick the system that you prefer.
Change the View
Before you begin going through all the items in your category folder, you may want to change how you view them first.
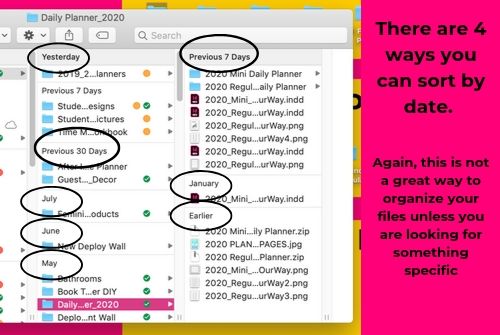
When you click on the folder you plan to work on first, there should be a grouping option for how you want to sort and view your items.
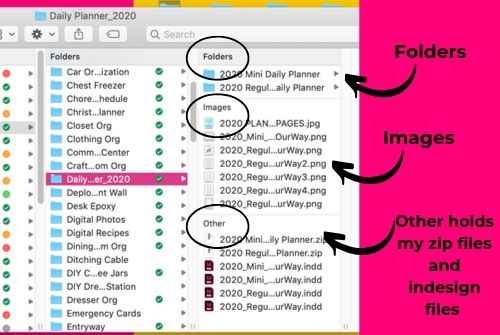
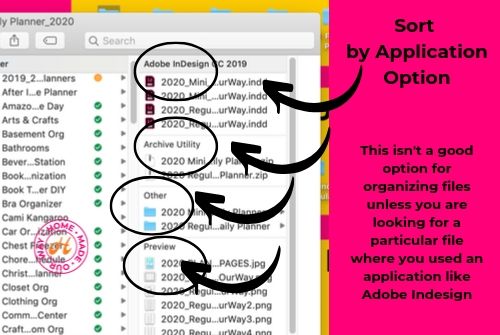
These options range from name (in alphabetical order) to kind (the type of file it is, such as a pdf or image).
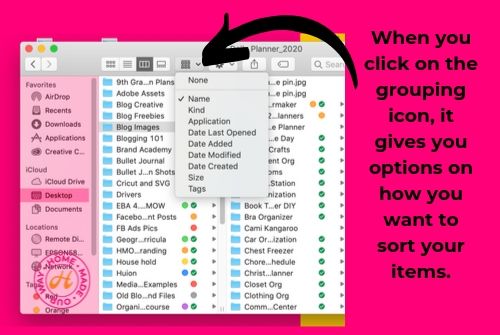
Here is what some of these options will look like.
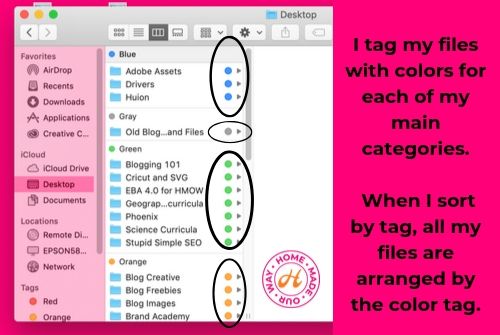
If you would like to use the “tag” option, I suggest waiting until you have decluttered your files.
You don’t want to waste time tagging files that you may eventually delete.
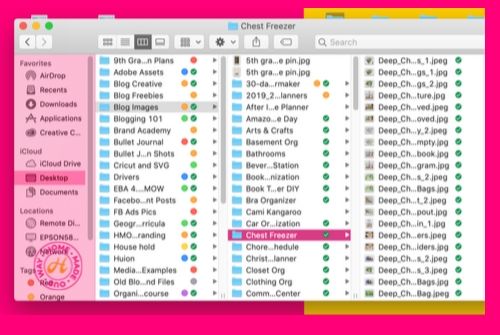
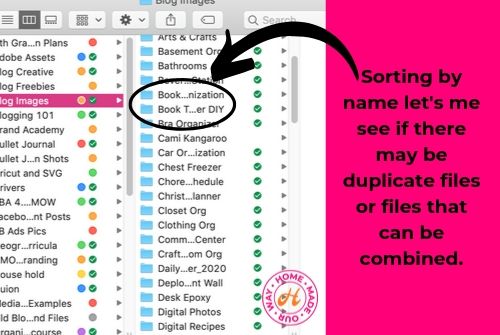
When it comes to decluttering files, I personally prefer to sort them by name.
This way, I can see if there are any duplicate files that I can consolidate or trash.
Cleaning out Your Files and Folders
Now comes the tedious part.
Go through every folder and folder file and start getting rid of duplicates as well as stuff that you no longer need or want on your computer.
Just hover over the item, click and hold it, and then drag it to your trash bin.
You can also right-click the item and choose trash from the pop-up menu.
As you go through your items, take the time to rename them or add a date to their name so you can locate them more easily.
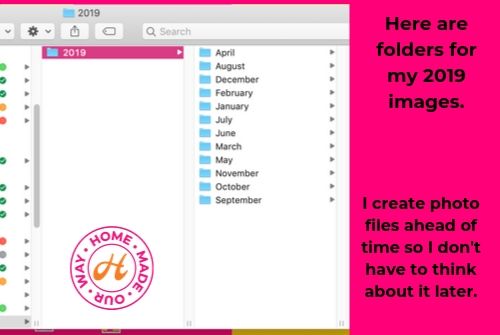
I especially like to include a date for my photos.
And no, you don’t have to know the exact date.
The month or year will work.
So, for photos taken in January, I would create a January file and then place this file into a folder titled for that particular year.
Now, depending on how much stuff you have and the time you have to dedicate to this task, this process can take a few hours or a few weeks.
If you have a ton of items, consider setting aside a certain amount of time and days to do this.
Stick to a schedule, and your desktop will become clear of all that cyber clutter.
Create and Design a Background
Create a Desktop Organizer
Another way to organize your files after you have decluttered them is by creating a desktop organizer.
I found this idea on Pinterest and prefer organizing my files this way.
Laura from I Heart Planners has a video tutorial for making a unique desktop organizer.
Check it out below.
Following her instructions, I created my desktop organizer. Check it out below.
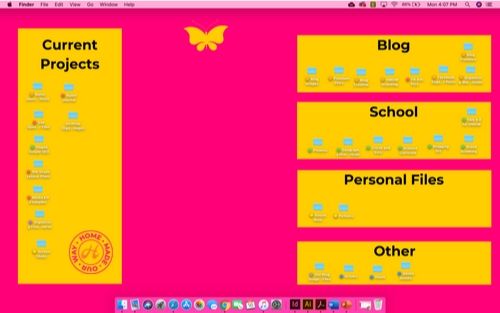
Have fun coming up with your designs!
Maintenance
Once you have everything decluttered and you are happy with your organization, it’s time to put a maintenance plan in place to keep your desktop clean and tidy.
First, try to keep up with your organization daily.
So, before you shut down your computer for the day, go over your screen and make sure that all your files and folders are where they should be.
Next, schedule one day a week for you to go through your files and folders and declutter any new trash.
You can easily do this by selecting the “date added” option in your main folders. This option will display your recently created files so that you don’t have to go through every single file or folder.
Then, go ahead and sort, categorize, tag, or trash your newly created files.
And don’t forget that if you have created something meant to update an older file, then look for that older file and replace or trash it.
Lastly, set aside one day of the year to visit older files and see if anything needs to be archived.
This includes old photos that can take up lots of space.
I like to keep a couple of years’ worth of photos on my computer.
Anything older than that is transferred to a flash drive.
Now, some computer trash bins are set to empty after a set number of days.
This could be 30 days or more.
And for some computers, you need to do this manually.
So, if your trash is not configured to delete its contents automatically, then schedule a day, preferably once a month, to empty your trash bin.
This will restore more storage space to your computer.
Final Thoughts on How to Organize Your Desktop
So, to recap this process, remember to:
- identify the types of categories your files fit into
- move all your desktop items into the appropriate folder
- set aside some time to go through each file
- decide to keep (and rename if needed) or trash files
- optional (create a desktop organizer)
- maintain your organization
- trash your files after 30 days
Again, if you have tons of digital files and folders to go through, schedule your time accordingly.
And with that, let’s get started!
More Digital Organization
Click here for help with organizing your digital photos.

Leave a Reply