Looking for an alternative to a big bulky and sometimes ugly file cabinet?
I love finding different ways to store items that do not take up much-needed space.
A lot of times, I try to take advantage of vertical space, and this time was no exception.
As I continued putting my home office together, I knew I was going to need something to hold my files.
That’s when I came up with this DIY pegboard for hanging files.
Now, if I need to file something or search for a file, I don’t have to pull out a long drawer (which, by the way, is something else to think about when adding a file cabinet to your office layout).
So, if you would like a space-saving way to store your files, then this DIY is the perfect solution.
Let’s get started on how to make this cute file organizer for you.

Disclosure: Some of the links below are affiliate links I provided for your convenience. Click here to read my full disclosure policy.
Supplies Needed to Make a DIY Pegboard for Hanging Files
Materials
- 2 – 1″ x 4″ x 8′ wood pieces
- 2′ x 4′ piece of pegboard
- 1/2″ staples
- paint or spray paint if you purchase an unpainted pegboard
- paint or spray paint for the frame
- 2 drywall anchors
- 6 screws
- enough washers to use as spacers (we used 30)
- Frame Hanging Hardware (see pic below)
- 2 – 4″-6″ long pegboards hooks for each stack of files you want to hang
- hanging files
- file folders
Tools
- tape measure
- miter box/saw
- staple gun
- wood glue
- 2 bar clamps
- jig saw
- sandpaper
- level
Creating This DIY Pegboard for Hanging Files
Measuring and Cutting the Frame Pieces
The first thing you will want to do is figure out how tall and wide you want your frame.
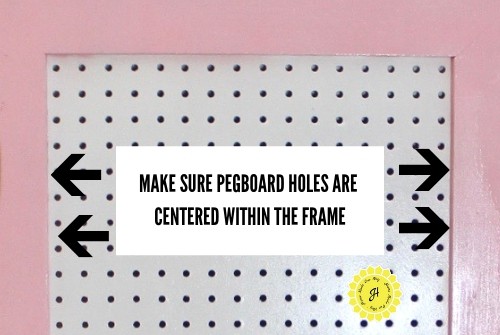
Use the pegboard to help you with these dimensions so that your pegboard holes are centered within the frame when you are finished.
You will also need some pegboard overlap so you can attach the pegboard to the back of the frame.
The frame for this DIY is 53″ tall and 23.5″ wide.
With these dimensions, we did not have to cut the pegboard piece.
Once you have the size you want, go ahead and cut your frame pieces out of the 1″ x 4″ wood pieces.
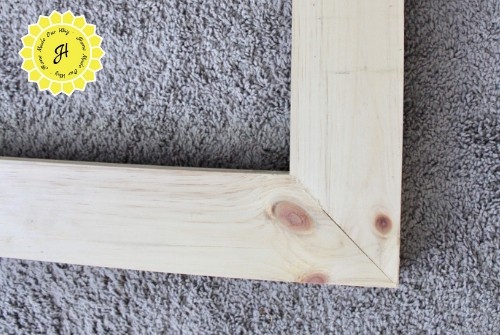
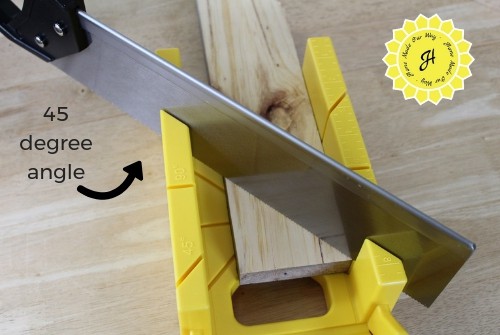
For the corners, you will want to miter them at a 45-degree angle.
Creating the Frame Design
Next, lay down the frame so you can pencil in your design.
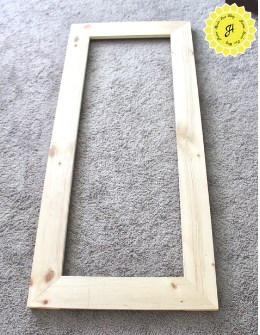
You only need to apply the design to two adjacent pieces. I drew lines to give my frame a mirror look.

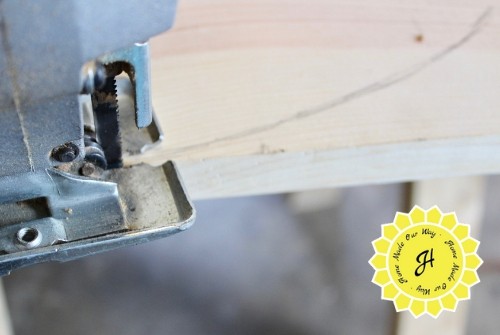
Next, using a jigsaw, slowly cut along the lines you made.
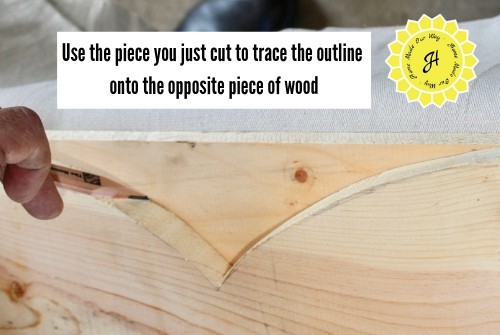
After you have finished cutting out your designs, place each piece of wood on top of the opposite frame piece and use it to trace identical lines.
Then, cut out those pieces as well.
Assembling the Frame
Place the newly cut frame pieces together and use both wood glue and staples (on the backside) to assemble them securely.
Then, add bar clamps for 24 hours, giving the glue time to completely dry.


Time to Paint
The next day, remove the bar clamps from the frame and sand the front and edges until smooth.
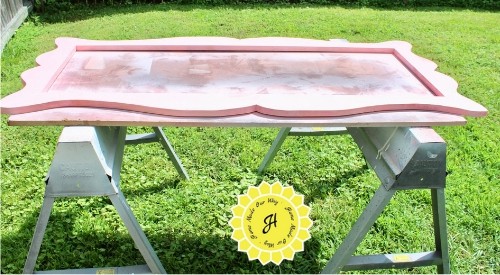
Then, lay out your frame and paint or spray paint it in your favorite color.
We used this color spray paint on it.
While that is drying, go ahead and paint your pegboard also if you did not purchase the pre-painted version or you just want it in another color.
Wait another 24 hours until both are fully dried.

Adding the Pegboard and Installing Hardware
First, lay your frame face down on a tarp to prevent any scratches in the paint.
Using a staple gun, attach the pegboard to the frame.
Remember to make sure that the pegboard holes are centered, or else your hanging files will sit uncentered.
Next, add the framing hardware onto the top portion of the pegboard. Make sure they are placed at exact distances from the top of the frame so that they hang straight.
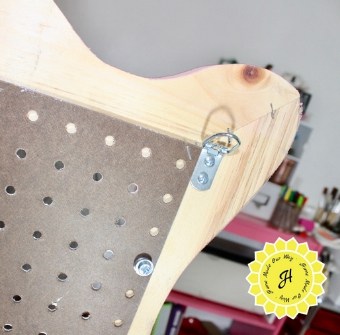
Then, using the screws and washers, install 6 spacers, 3 per side, along the backside of the pegboard.
The spacers are used to keep the frame from lying on the wall.
Without the spacers, you will not be able to add pegboard hooks.
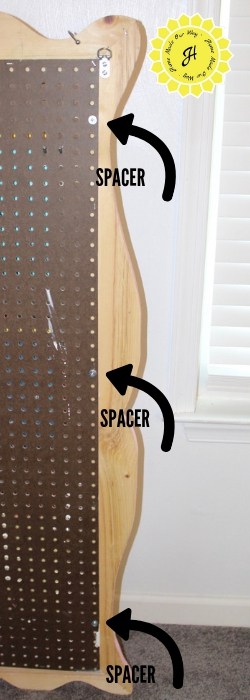
We placed these spacers into the overlapping pegboard holes.
For each spacer, we stacked six washers.
This measured out to a 1/2″ length.
Then we screwed the spacers into the frame.
Hanging Your Pegboard Display
Next, you will want to install two drywall anchors in the wall.
Lay a level on the screws to ensure they are straight.
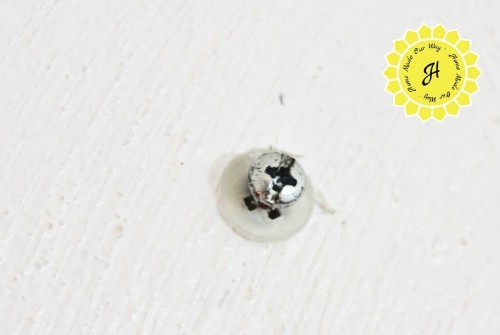
Then, slide the frame until the framing hangers come into contact with the drywall anchors.
And that’s it.
Now you can start adding your pegboard hooks, hanging files, and then files.
I think you’ll agree that this looks a lot prettier than some industrial-looking file cabinet.
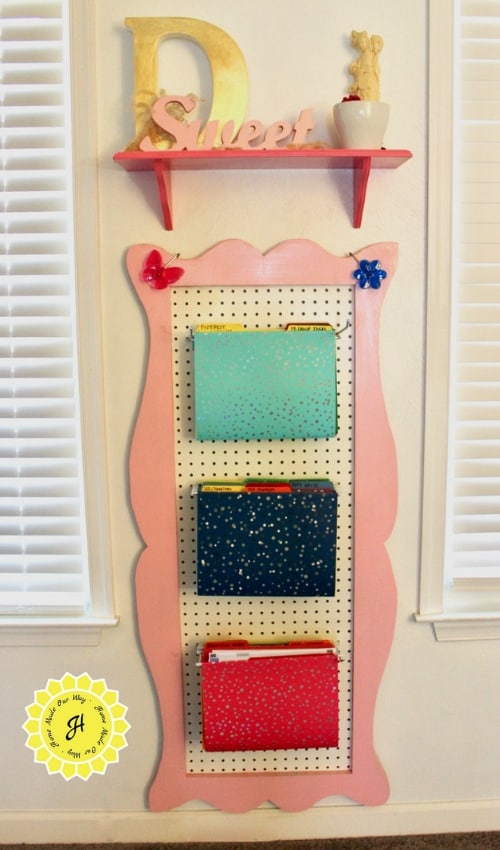
Here is my DIY pegboard hanging file holder today.
It can hold 4 stacks of hanging files if I just move the hooks around, but three stacks were enough.
And if you are wondering how many hanging files and file folders each set of hooks can hold, well, this will depend on how many files you have and how thick your files are.
I can fit 7 – 10 hanging files per hook, with files holding approximately 20-30 sheets of paper.
So, what do you think of this DIY pegboard for hanging files?
If you have any questions about this project, please feel free to leave them in the comments below, and I’ll get back to you asap.
Looking for more ways to organize with a pegboard? Check out my Nerf Wall DIY for organizing your kids’ Nerf guns and ammo.

Great project I love the frame. I want to try to make one too. Happy Spring, Kippi #kippiathome
Glad you liked it, Kippi. Happy Spring!
Thanks for the directions on this cool organization pegboard! I’ve been trying to find a good option like this for my office at work. We have a bit of a filing backlog so we need to work on organizing our files.
Your welcome, Mindy! I absolutely love mine.
How did you hang the files on the hooks?
Hi! You would use hanging files with side brackets. Here is a link so you can see what they look like: https://amzn.to/4oyA9xP.