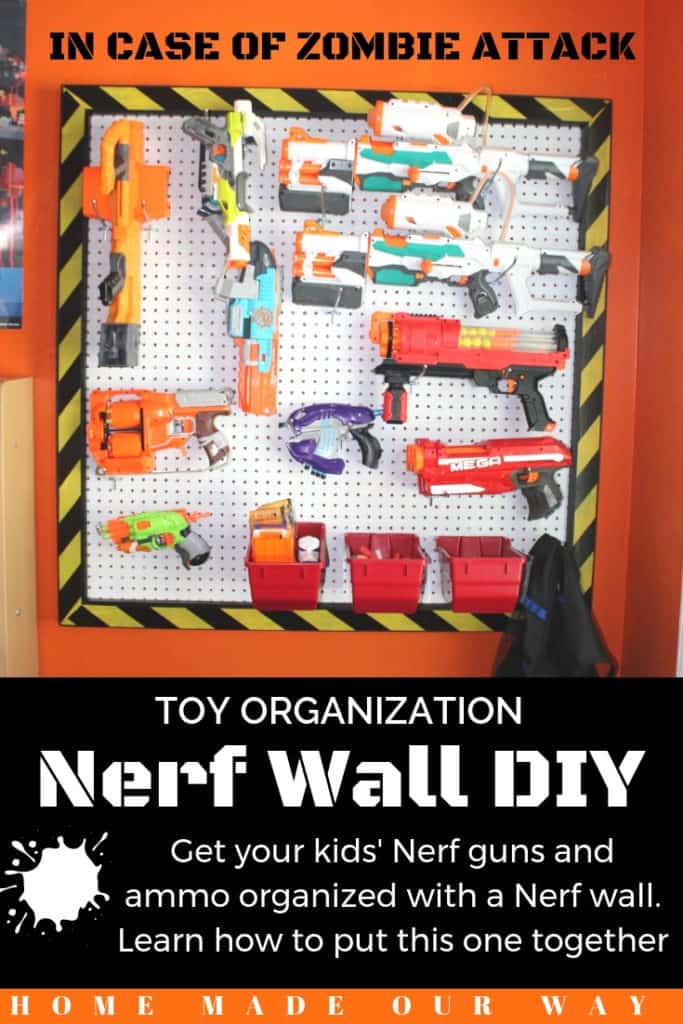
Looking for a way to organize your kids’ Nerf gun collection? Try this space-saving Nerf wall.
Disclosure: Some of the links below are affiliate links that I have provided for your convenience. Click here to read my full disclosure policy.

When we were organizing our boys’ rooms, we didn’t know how to store their Nerf guns.
Nerf guns seem to be getting bigger every year, taking up much-needed space.

After searching for ideas on Pinterest, we decided to give it a try and build a Nerf wall.
Now, the boys’ rooms are roomier, and they love their wall. I just wish we had done it sooner.
Nerf Gun Rack DIY
Below, you can see how we put our wall together.
To get your Nerf wall diagrammed plans with steps, click the pink button at the end of this post.

You will also find other free printables, like our latest Project Planner [pictured below], to help you put this wall together.

Our DIY project resulted in a 4′ x 4′ wall. However, feel free to modify the dimensions to fit your space.
If this DIY is a lot to take on, try my friend Tom’s invention. Scroll down to the end of this post to check it out.

Before You Start
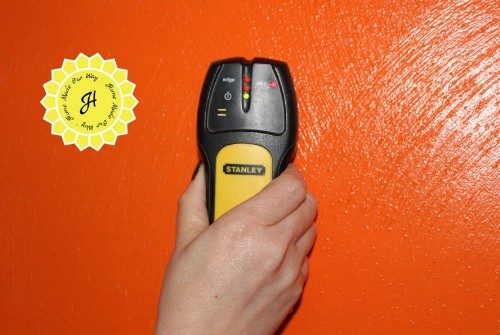
Make sure to measure your space and mark the location of your wall studs.
This Nerf wall was attached to three studs. If your Nerf wall is bigger, plan on attaching it to more studs.
This project was done over two days because we had to wait for the paint to dry.
Also, when attaching the frames to the wall, you will need another person to assist.

Materials
- Nerf gun wall DIY plans
- 8 – 1″ x 3″ x 4′ wood for frames
- 1 – 4′ x 4′ pegboard
- 8 – 2″ x 2″ L-shaped metal braces
- white paint or spray paint (or any color of your choice for the pegboard)
- black paint or spray paint (or any color of your choice for the front frame)
- assorted pegboard hooks
- 3 pegboard bins (more or less, depending on your needs)
- 8 – 2 1/2″ drywall screws
- roll of striped caution tape
- 24 – 3/4″ wood screws
- 12 small finishing nails
- black permanent marker

Tools
- tape measure
- miter box/saw
- Phillip’s screwdriver
- paintbrush/roller
- drill
- stud finder
- level
- razor/Xacto knife
- hammer
Nerf Wall Frames
We built two frames for our Nerf wall. The back frame is used as a spacer for the pegboard hooks.
When building the frames, you will need to miter the ends of the 8 boards at a 45-degree angle.
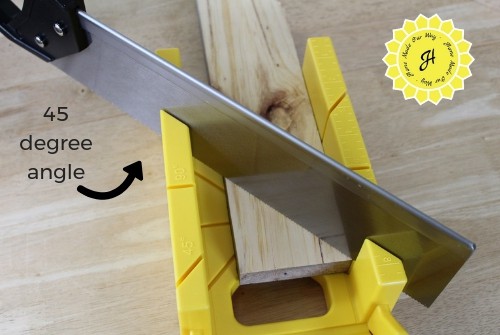
Then, attach two boards at the corner with metal braces.
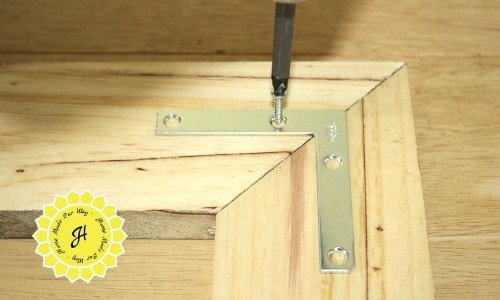
Repeat this step for the rest of the boards, making two frames.

Painting
After painting one of the frames black, you will want to paint one side of the pegboard white. White pegboard is sold in most home improvement stores, but it can be a little expensive.
Layering
After all the paint has dried, wrap the outside edge of the unpainted frame with caution tape.
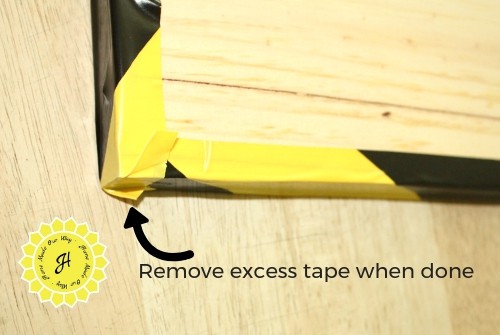
Lay this same frame on a flat surface, then place the pegboard on top of it, painted side up.
After making sure the edges line up right, attach the pegboard to the frame with 3/4″ wood screws. (Space them out so that you use 6 screws per side).
Installation
Using the stud locations on the wall, mark the pegboard/frame with these measurements (top and bottom of the frame) so you can pre-drill holes for the drywall screws.

Afterward, install the pegboard/frame onto the wall by aligning the stud locations to the pre-drilled holes.
Use a level to make sure it is straight before drilling it into the wall with the drywall screws.
Use two drywall screws per stud, top and bottom of the frame.
Framing It Out
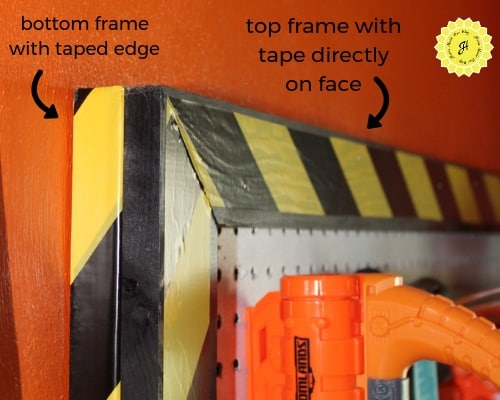
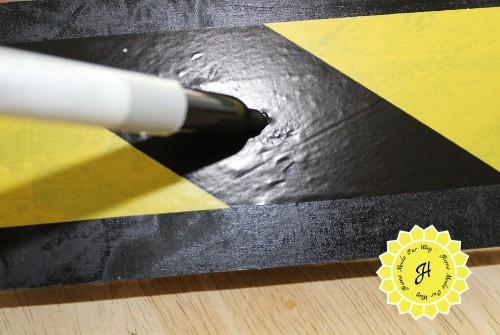
Next, apply caution tape on the face of the black-painted frame.
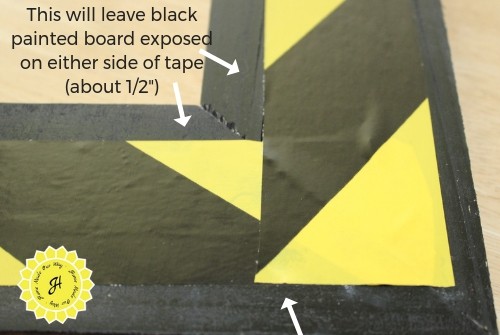
Then, use an X-Acto knife to trim the tape on the mitered edge of the frame.
This gives the tape a blended appearance.
Line up the painted frame to the pegboard/frame and attach it with finishing nails.
Make sure to only place nails in the black portions of the caution tape. We used 3 nails per side.
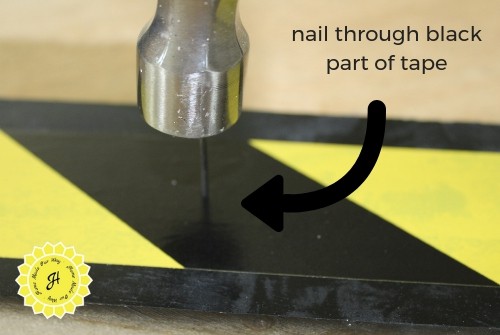
Cover up the heads of the finishing nails by coloring them in with a black Sharpie.
Finishing Touches
To make your wall stand out, consider adding stenciled lettering above it, such as “In Case of Zombie Attack” or whatever quote you’d prefer.
If you have a Cricut machine, you can create stencil-writing decals, or you can find personalized ones on Etsy.
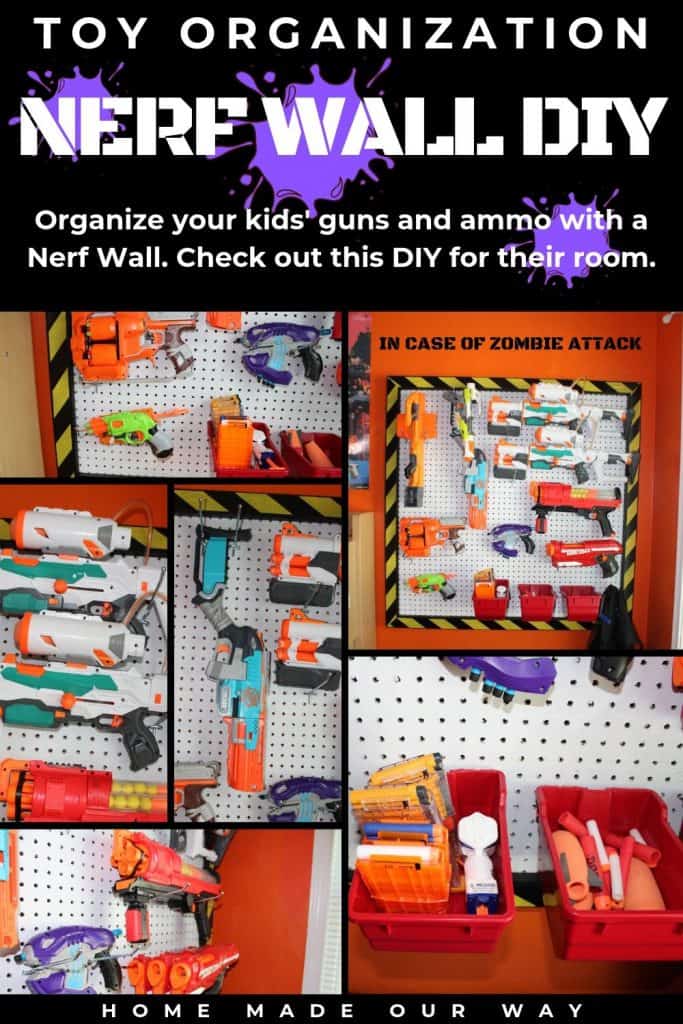
Nerf Wall Configurations
To place your pegboard hooks, you’ll need to use a little trial and error as you place your guns.
You can also add bins to hold ammo, eyewear, and smaller guns.
Below are some of the configurations we used for some of the guns.

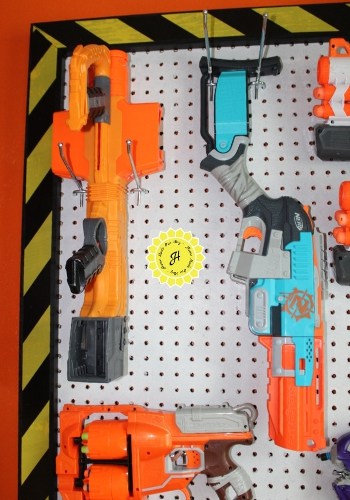
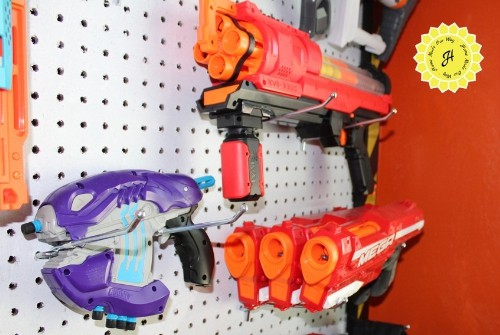
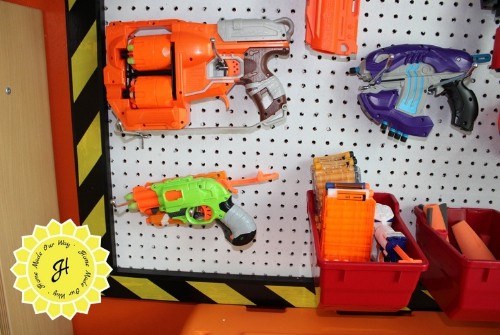

Diagram Plans
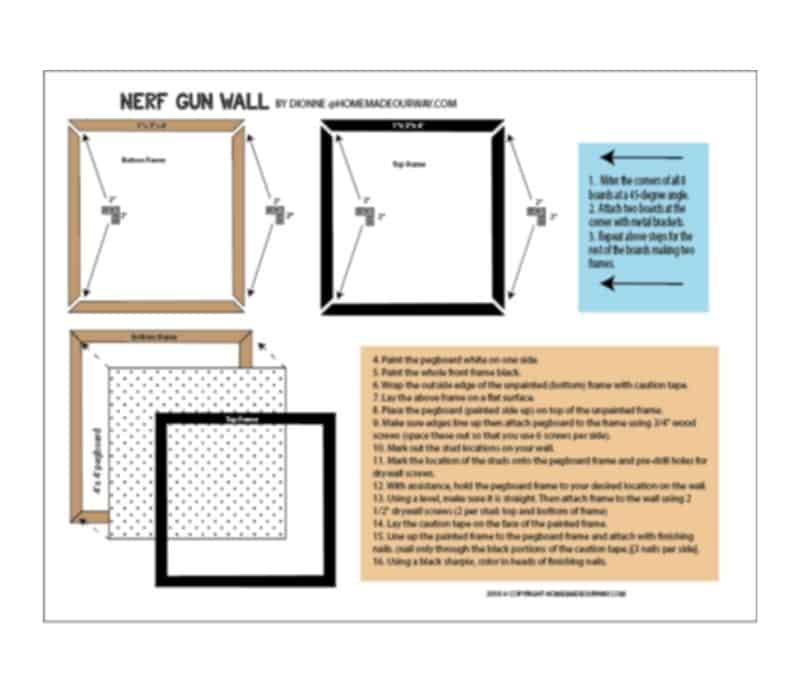
To get our Nerf wall DIY plans, click the pink button.
An Alternative to the Nerf Wall
As I mentioned before, if this DIY is a lot to take on, try this out instead.
My friend, Tom from NerNerds, has an Etsy shop where he sells Nerf gun brackets you attach to the wall. Check out the pic below.
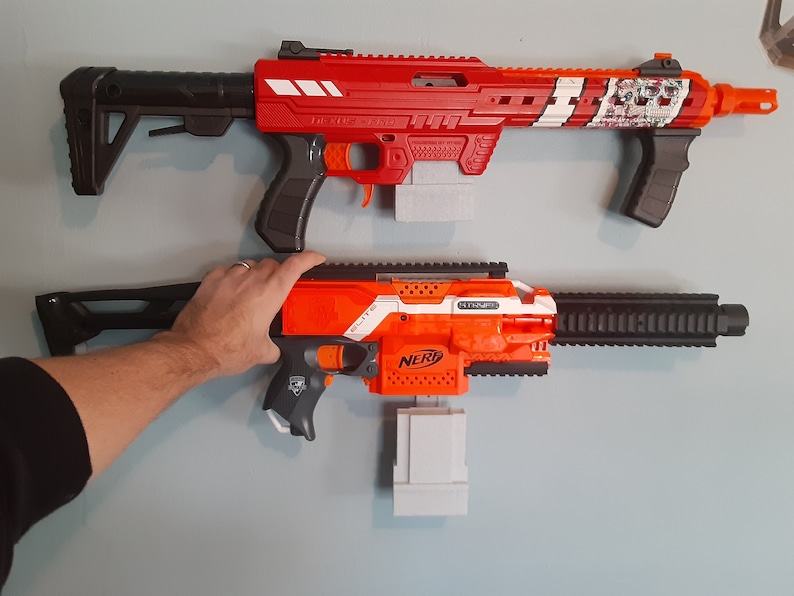
Isn’t that cool?! This lets you place brackets wherever you want, like low for younger kids [or high, for Nerf collectors].
As you can see, this works for guns that have cartridge openings.
Usually, these are the really big guns, and you know how cluttered they can make your space.
You can find Tom’s shop here.
I hope you enjoy doing this project. Send pics of your Nerf wall to dionnem@homemadeourway.com. I’d love to see your finished work. Good luck!
Other Space-Saving Projects
Save This
Want to save this post for later? Hover over the image below and click the Pinterest icon to save it to your favorite board.

Leave a Reply