Organizing Your Tax Records and Paperwork
For many of us, tax time can become very stressful especially if all our tax documents are not organized.
And if you have someone doing your taxes, having them sift through a shoebox full of receipts can be time-consuming.
The longer it takes your tax preparer to go through your paperwork, the longer it will take them to get your returns prepared. So, let’s see if we can make this process easier for everyone.
Also, scroll to the end of this post to get our free tax inventory forms to help you sort and organize all your tax documents and receipts.
Disclosure: Some of the links below are affiliate links that I have provided for your convenience. Click here to read my full disclosure policy.
Disclosure: I am not a certified public accountant. If you have questions that deal with taxes, please seek advice from a certified public accountant.
Steps to Take Before You Begin
1: Check for Document Expiration Dates
Before you begin, find out how long you really need to save and store your tax records. You can click here to find out the IRS’s requirements for your situation. You may need to keep them for only three years but check just in case.
2: Check for Documents You Need
Everyone’s tax situation is very different. Some people have dependents and others may own businesses and have employees. And this means needing different tax documents before you file.
Click here to access various checklists of documents you should have and will need.
Once you find the checklist(s) you need, go ahead and print them out. Then, go through the list and highlight the documents you should have.
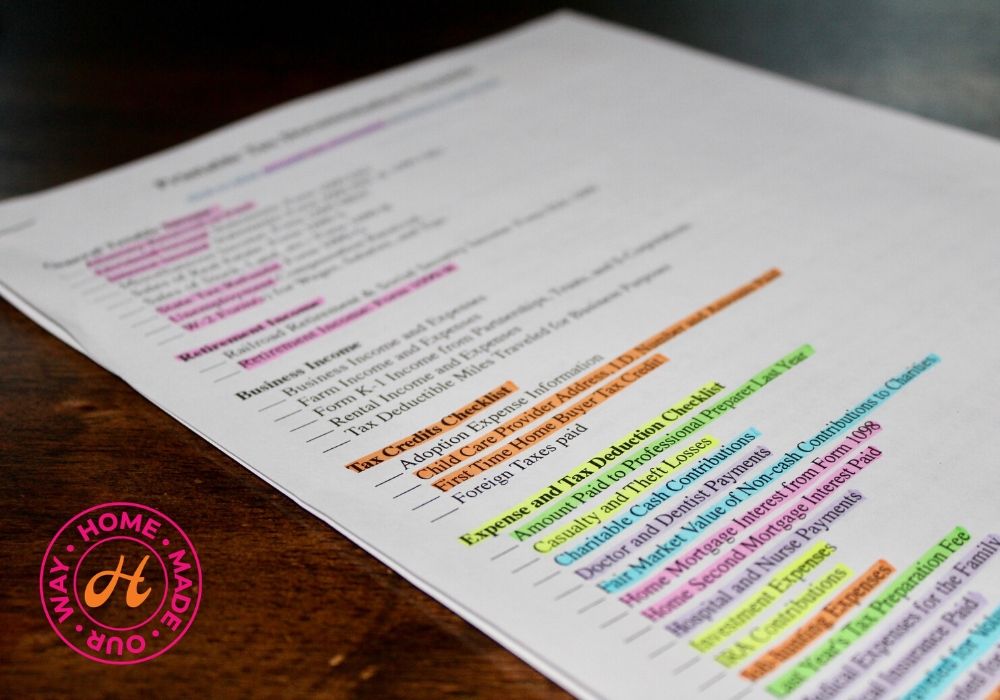
If you are unsure about a particular document/form, click here. Just enter the form name or number in the search box to learn more about it and see if it is a required document.
If you have an accountant, you can ask them for a checklist of forms and receipts that you need to save throughout the year. You could be accidentally throwing away receipts and invoices that your accountant needs in order to save you more money.
3: Organizing Materials You May Need
Below is a list of materials you may need. Some are optional but could make this process easier.
- Shredder
- Accordion file organizers like this one
- File folders
- Plastic envelopes (great if you have a ton of receipts)
- Labeler
4: Take Your Time
Lastly, take your time as you organize. These are important papers you are dealing with and you don’t want to inadvertently shred papers you need.
Also, if this is your first attempt at organizing your documents, this task may take a while to complete. But once you have this system in place, preparing your documents for the coming years should not take long at all.
Gather & Sort Your Tax Documents
Sort By Entity and Year
The first thing you will want to do is gather all of your tax documents, receipts, invoices, etc. into one place. I suggest using a large table like a dining room table.
If you own a business, go ahead and make two piles. One is for your personal tax documents and the other is for your business. If you have more than one business then create a separate pile for each entity.
Now using your IRS-required document deadline, begin separating each of these piles by year. If you find any documents you are no longer required to keep, go ahead and shred these.
Below is an example of what these sorting piles may look like if you are required only to keep three years’ worth of documents and you own a couple of businesses.
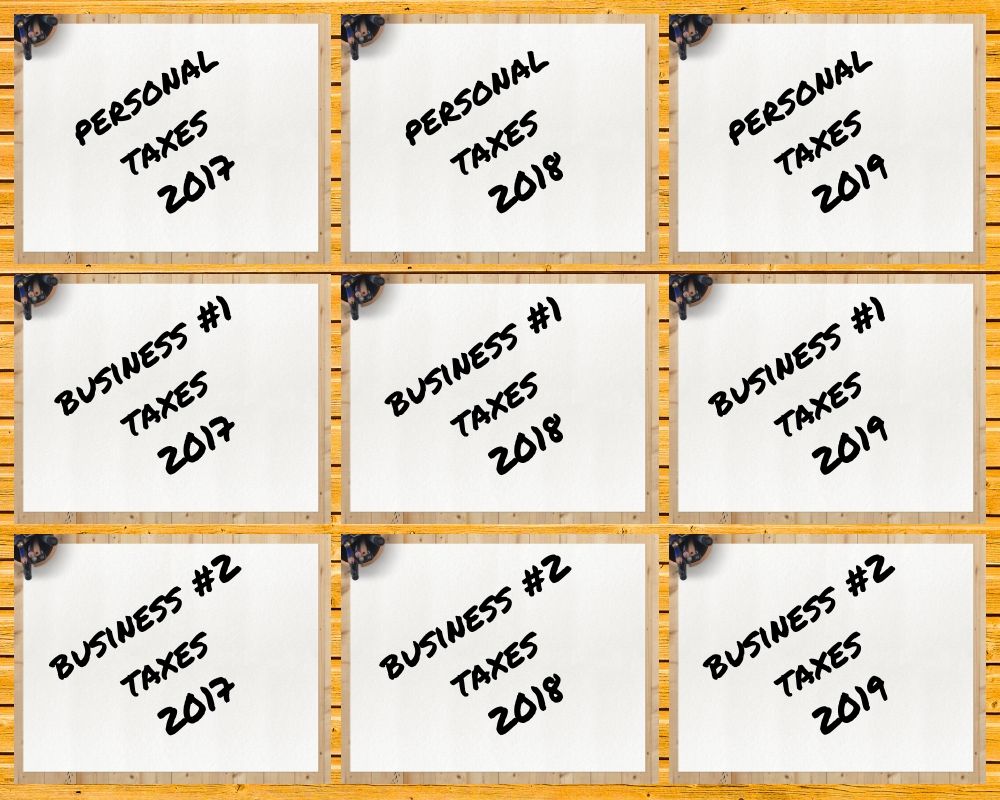
Up next, we are going to further sort and organize each of the piles. I suggest starting with your personal taxes and starting with the earliest year. So in the above example, I would start with the 2017 personal taxes pile, followed by 2018 personal taxes, and so on.
Sort By Type of Tax Document
For the purpose of this post, I will refer to personal taxes but the same method can be used for business taxes as well.
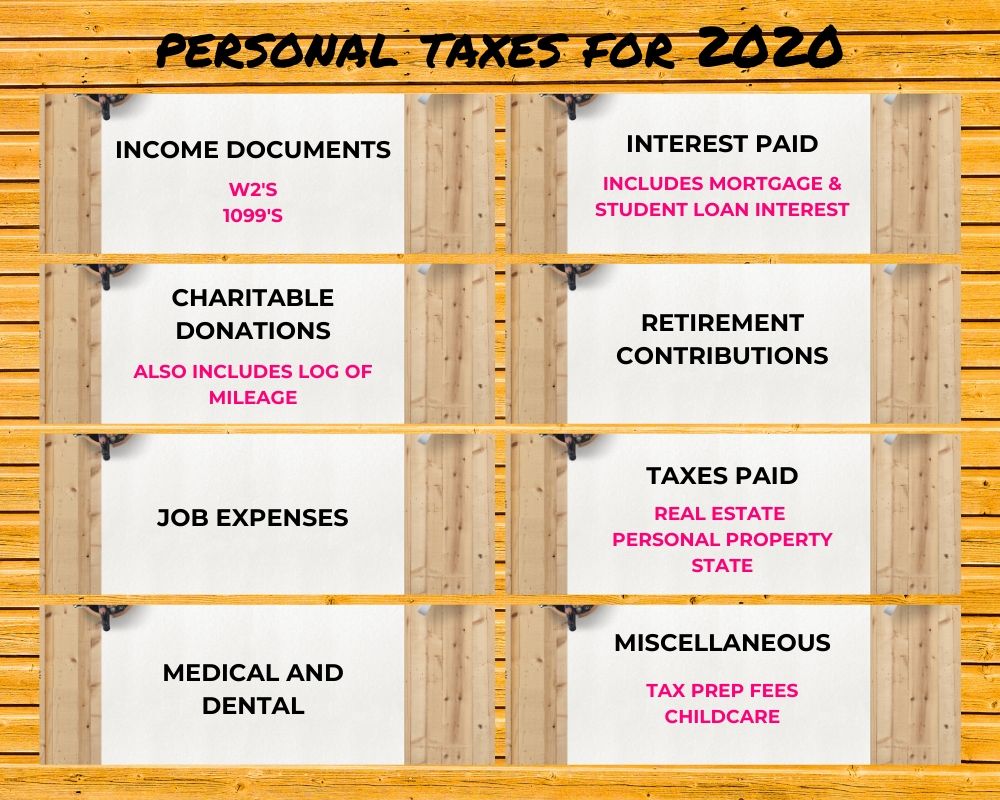
Now, using your tax document checklist, begin creating separate piles for each type of document you have. If you do not have a ton of documents, you can simply create a pile for income documents and another for deductibles and credits.
Here is what my typical sorting would look like. I usually have a few income documents but lots of credits and deductible expenses.
Storing Your Tax Documents
Accordion File Organizers
The best way I have found for storing my tax documents is with file folders within a slim 10- or a 13-pocket accordion file organizer. These organizers fit nicely on my bookshelves and do not take up a lot of space.
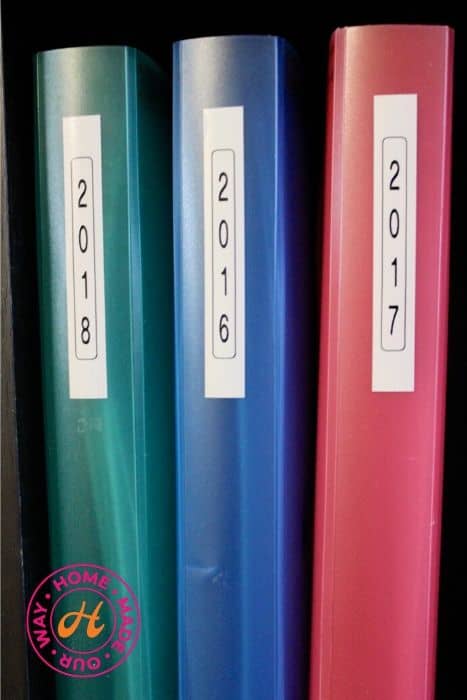
You’ll want to purchase an accordion file organizer for each of your entities per year. So, if I have three years’ worth of personal taxes, then I just need three.
Next, you’ll want to label your accordion file organizers. For personal taxes, simply write “Personal Taxes” followed by the year. If you have a business, label it with the business name and year.
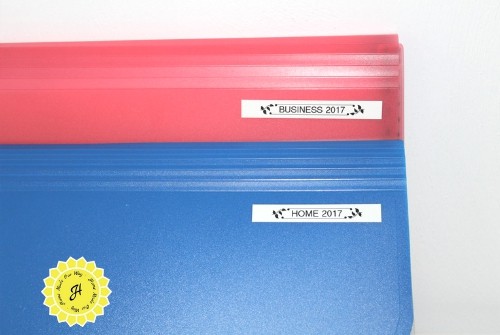
Although you don’t necessarily need file folders if you use an accordion file organizer, I prefer to use them for two reasons:
- To avoid having to fill out those “way too small” pocket label tabs
- And so I don’t have to dig into the pockets looking for a particular form
Now, when I open my organizer, the labels are large and clear, and when I need to find a particular form, I just pull out the folder I need. This also helps smaller papers and receipts from getting crushed.
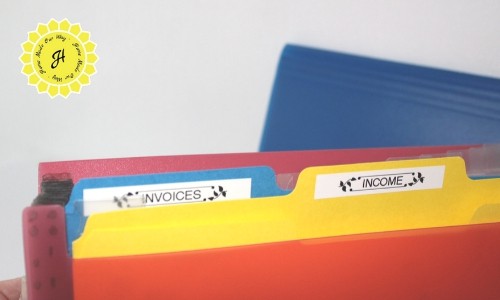
File Folders
If you decide to use file folders, simply label them according to the piles you made earlier. Here are my file folders for my personal taxes.
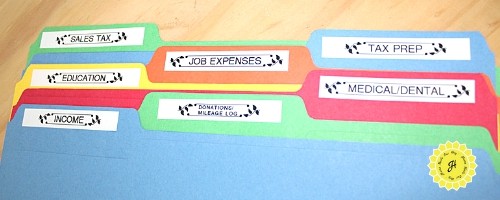
And, here are my file folders for my business taxes.

Creating a Record
Next, you’ll want to create a record of your information “just in case”. You don’t have to record every single purchase or transaction you make, but you should record those transactions that will impact your taxes.
One year I collected a year’s worth of job expense receipts. When it came time to enter them into my tax software, most of them had faded so badly I couldn’t make out the date or amount. So I lost out on those deductions.
If you use an accountant, keeping a detailed and organized log will enable him/her to complete your returns very quickly.
Below I have several ways you can create a record of your documents, forms, and receipts. Choose the one that best fits your time and budget.
Using a Software Program
Software programs like Quicken are great for recording your financial information. And some actually provide a way to transfer needed information to tax software programs making it even easier to file your taxes.
However, you must be diligent. Make sure you record your information as soon as possible and categorize transactions correctly. That is, if you enter a receipt for medical care, make sure that you specify this so that your program recognizes it as a possible tax deduction.
I find these programs quite expensive especially if you do not own a business and your taxes are not very complicated. If you prefer a cheaper option, continue reading.
Spreadsheet Program
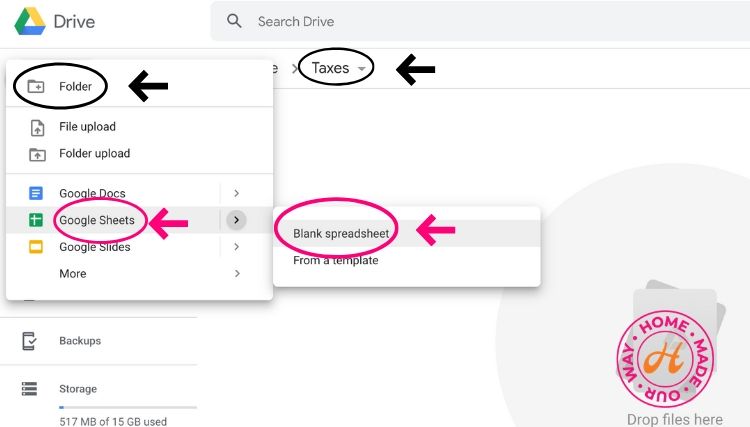
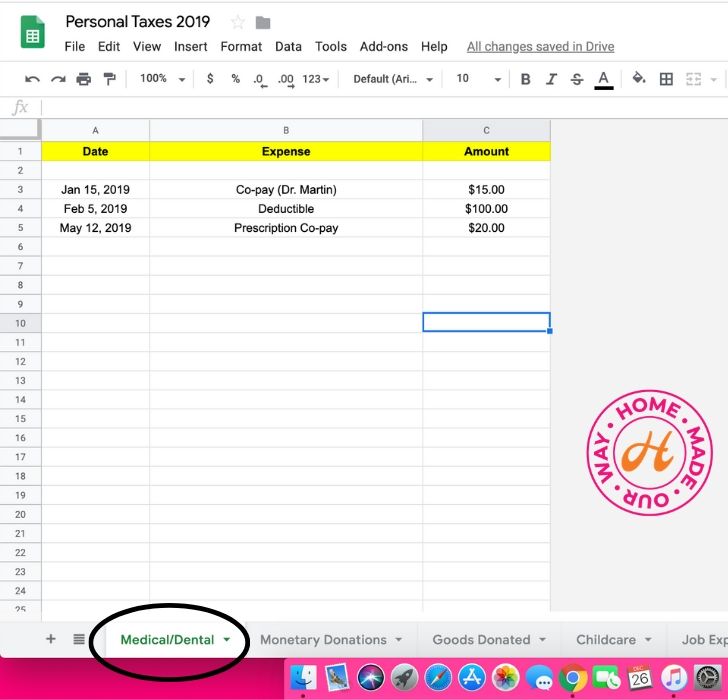
Another way to record your financial information is by using a spreadsheet application. I prefer this way myself and use Google Sheets. The best part is that it is free to use.
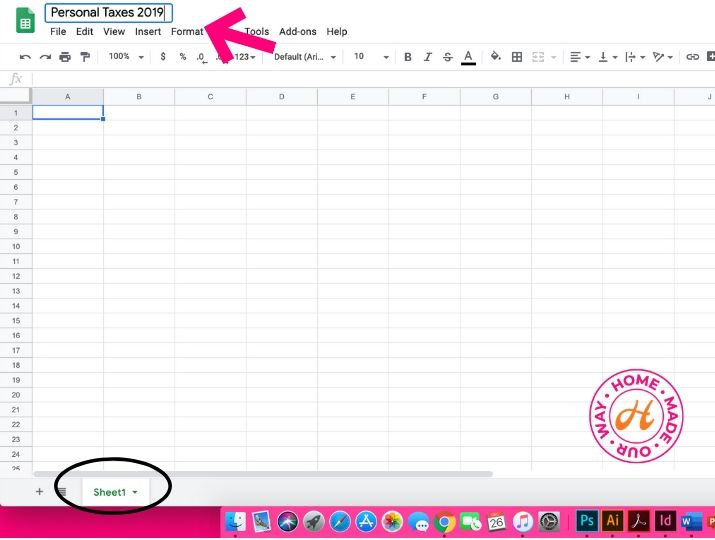
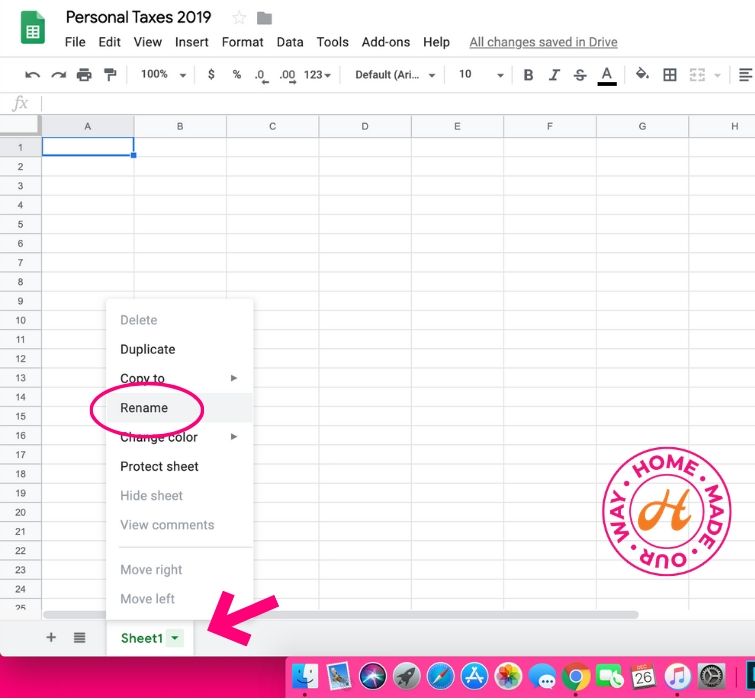
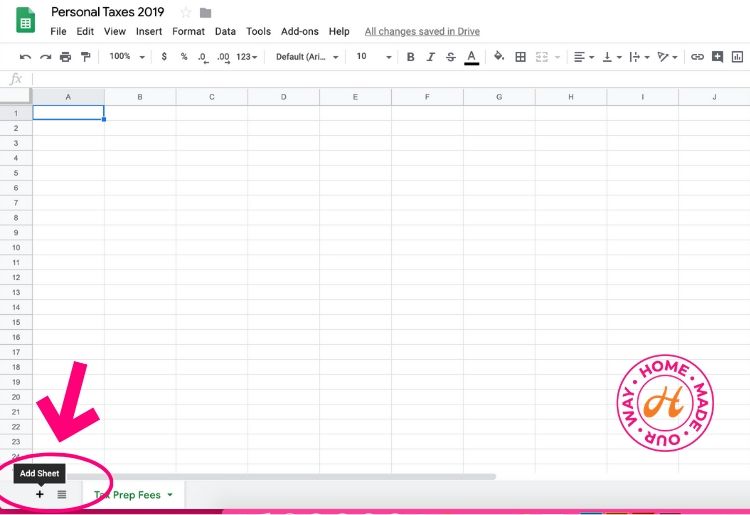
Simply open a new sheet and begin creating relevant columns for your finances. You can create additional sheets within the new sheet if you’d like to record both your personal and business information together.
Here is a quick photo tutorial on how to create a spreadsheet in Google Drive for your taxes as well as ways you can label your columns.
Simple Pen & Paper
You can easily record your information within a simple notebook. Again, if your taxes are relatively easy, this could be the best option for you.
Just like Google Sheets, you can create columns and use different pages for different tax topics.
Photographs
Since 1997, the IRS allows scanned copies and photos of receipts as proof of expense. Just make sure it is legible. This is a great alternative to saving piles of receipts. Just remember to record them using one of the above methods.
Apps
And lastly, another alternative for recording your receipts is through the use of an app. There are many receipt scanning apps that will not only take a photo of your receipt but will categorize them for you as well.
However, many of these apps are not free. So, if you feel you have a lot of receipts and not a lot of time to deal with them, then this option may be a better fit for you.
Here is a list of some apps, if you’d like to explore and see which will work for you.
The Following Tax Year
Now that your documents are organized and you’ve picked a recording system you like, the following years’ documents will be easier to manage.
In order for you to stay on top of your documents “throughout” the year, you will need to purchase another accordion organizer and label it with the current year.
Then at the start of every year after, simply shred records from the accordion organizer that has “expired” and reuse them for the current year.
So, using my example at the beginning of this post, when I begin accumulating 2020 forms and receipts, I can go ahead and shred my 2016 documents and reuse the files and organizer for 2020. Just don’t forget to change the year on your organizer.
Final Thoughts on Organizing Your Tax Documents
So, remember:
- Check with the IRS to see how long you need to keep your documents
- Sort your documents by entity and by year then create files for these
- Use an accordion file organizer for each entity/year
- Create a record of your receipts and invoices
Try to record and store all your documents as they become available. This will save a ton of time for you (or your account) when it’s time to file.
Your Free Tax File Inventory Pages
Below are free tax file inventory pages that I created for you to keep in your accordion organizer. They are super helpful when you need to pull information out without necessarily having to go through each document.
For your cover sheet, simply fill in the information for each section of your accordion file, then place the slot number on the right. This makes it so easy when you are trying to find a certain document.
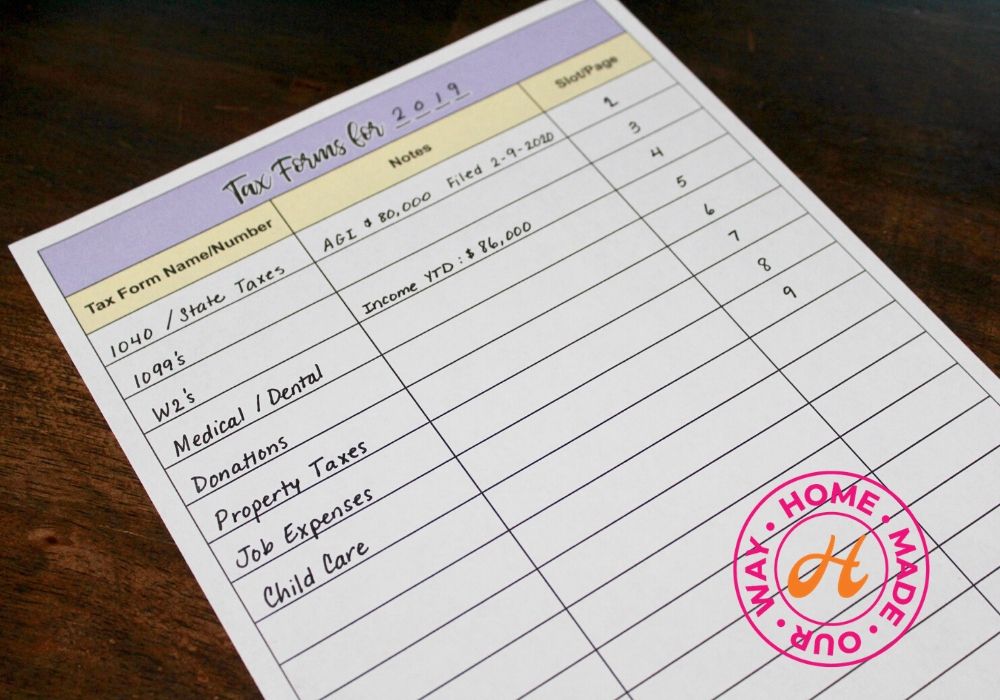
To get your free printables, simply fill out the form below to receive access to our resource library where you will find these pages.


Leave a Reply