Purging and Arranging Your Master Closet
When it comes to clutter, reach-in and walk-in master closets are equally prone to becoming overstuffed.
Reach-in closets are small and lack enough storage space.
While on the other hand, walk-in closets are larger but make it a tempting spot to store more items in it unnecessarily.
In this post, I’ll go over:
- how to evaluate your master closet for DIY and closet systems
- different closet systems that can work for you, your space, and your budget
- decluttering steps
- the best way to arrange your items
- and extra components you can use to optimize your closet storage

Disclosure: This post contains some affiliate links for your convenience (which means if you make a purchase after clicking a link I will earn a small commission but it won’t cost you a penny more)! Click here to read my full disclosure policy.
Organizing the Evaluating Your Master Closet Before
Before attempting any task, take a good look at your closet and take some notes.
Write down all the things you are keeping in there besides your clothes.
You may be keeping an
Ask yourself, do you really need to keep these things in there?
Can you relocate these items to another part of the home like an attic, garage,
Do you have too many shoes?
Try relocating them to a shoe organizer you can easily keep under your bed like this one.
If you cannot relocate certain items, don’t worry.
Later in the post, we will go over how to arrange your closet to optimize its space.
DIY
Next, let’s evaluate your closet for any DIY.
Can you add extra shelving or attach hooks to the inside of the door?
Is it possible to add a little more space by knocking out an adjacent wall?
Again, this is dependent on your situation.
And let’s talk about design.
Want to give it some pop with wallpaper?
Or perhaps you’d like to change the doors or even remove them.
And how about lighting?
For a walk-in closet, lighting is a must but it can also make a statement in a reach-in closet.
But before you think about knocking out that back wall, read this article that goes over the disadvantages of walk-in closets.
A reach-in closet may be exactly what you need.
Master Closet Systems
And lastly, if you plan on installing a closet system, take measurements of the space and start putting together a budget.
Depending on the closet system you choose and the amount of space you have, this can get expensive.
However, don’t worry about the type of system you’d like to install yet.
You’ll need to do a second evaluation after dealing with the contents of your closet.
Decluttering Your Closet
Okay, now that you have an idea of what you want your closet to look like, it’s time to declutter it for our second evaluation.
The first thing you will want to do is to completely empty your master closet.
If you have items you can relocate, do that now.
If not, just set those items aside.
Remove
Normally, I just lay out clothes on a bed.
However, if you have a ton of clothes, get a clean sheet and lay this on the floor so you can keep your clothes sorted.
If you took measurements before, take them again now that the closet is empty.
If you plan on doing any DIY, create a quick sketch on some graphing paper.
Or you can use our free project planner to put together a complete plan of your master closet.
Declutter Your Clothes
Now, it’s time to declutter your
To help you out with this, use the steps found in “How to Easily Get Rid of Too Many Clothes” <–by clicking here.
Depending on how many items you have this could take a few hours or a whole day, so plan accordingly.
Once you’ve purged your wardrobe, we are going to put them back using the sloping technique.
Arranging Your Wardrobe
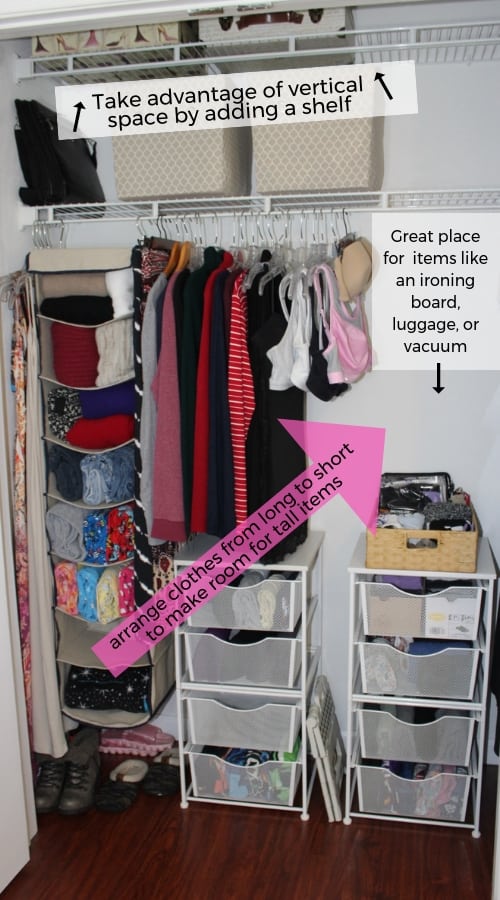
If you have a hanging bar in your closet with nothing below it, you’ll want to arrange your items by length.
That is, placing your items on the hanging bar from the tallest to the shortest or vice versa.
For example, if you own a few maxi dresses, you’ll want to place these on one side of your closet’s hanging bars.
Next, follow this with long dusters, shorter dressers, then jeans, tops, and anything else you have that is smaller.
Below is a picture of how I use the sloping technique.

The point of the sloping technique is to optimize the space on one side of your closet.
For the end of the hanging bar that is holding the shorter items, you can place another
Or you can place another type of organizer for other items you are keeping in your closet such as a small chest of drawers.
If you have to share your closet with a vacuum or luggage, this is where you can store it so it doesn’t interfere with you as you access your
As you can see from the above photo, I could have put an upright vacuum cleaner on the right side or perhaps another bar/
Play with this technique to get your closet space optimized.
If you do not plan on doing any DIY or installing a closet system, then you are done.
But if you do plan on putting some work into your closet, continue reading.
A Second Evaluation
For Any DIY
Now that you’ve returned your
So, for any DIY you plan to do yourself, take note of what is possible now that your items are organized.
Also, take a visual inventory of your items.
If you did a good job of purging your wardrobe chances are you may not need to purchase a large organizer or perhaps you don’t need that second hanging bar anymore.
If you created a sketch earlier, return to it and make any adjustments to reflect the new changes.
Create a list of items and materials you are going to need.
You may also want to create a budget if it’s a big DIY project.
For Closet Installs
If you are planning to install a closet system yourself, make sure all your measurements are accurate.
Then do some research, preferably online as many sites now offer the ability to create a plan using your measurements.
Below is a list of sites that have a design feature letting you put together your own system:
If you decide to design your own system, make sure it will work with the type and amount of
For example, If you have more items that need hanging as opposed to folding, then a system that provides more hanging bar space and fewer drawers will work much better for you.
Now, If you prefer to consult with a designer before you do any installation yourself, try:
These sites provide a consultant to work with you so that you get the right pieces you need for the job.
However, if all you need is a few pieces here and there, these are your best bet for budget-friendly picks:
- Closet Maid (Amazon)
- Walmart
- Rubbermaid (Amazon)
Now, if money is not an issue and you’d like a total closet makeover without getting your hands dirty, try these companies:
- California Closets
- Easy Closets <– they also have a design-it-yourself application
They will have a professional come in, take measurements, design your closet, and install it for you.
Ready to DIY?
Ok, so you have your supplies and hopefully, you put a plan together for your closet, now it’s time for some DIY.
Most likely, you are probably going to have to remove part of if not all of your closet contents.
Just make sure if you are doing any painting or have to do some sanding, protect your
Move them to another room if possible.
Tips and Ideas for Your Master Closet
I love taking advantage of wasted spaces.
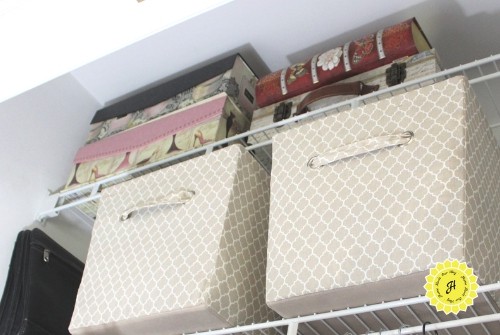
One such space is the top portion of closets.
From my experience, there is usually a foot of useable space that tends to get ignored.
To get more shelving, install an extra
You want it just low enough so that you can access it easily and high enough not to interfere with items you are keeping below it.
This is what I did in our reach-in closet.
Here, I keep things like my keepsake boxes. You can store small luggage, hatboxes, shoeboxes, etc.

Consider over-the-door organizers.
You can use these to hold belts, gloves, socks, small purses, and other accessories.
This one lets you hang jewelry as well.
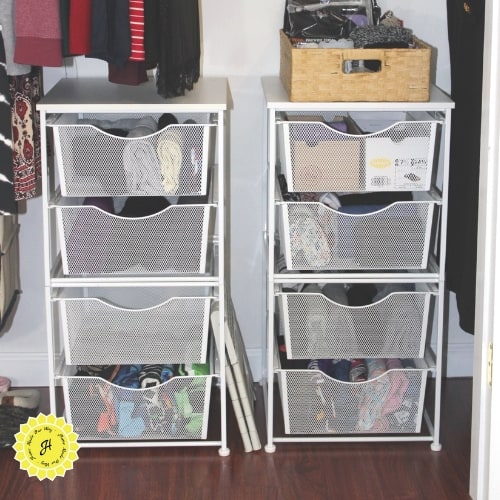
I no longer own a bulky dresser or chest for my clothes after I did my deep-dive purge in 2015.
But I still wanted a place for little items like panties, socks, tank tops, etc.
At the time I had a tight budget so I waited until I received a 25% off coupon (including sales items) for Michael’s Arts & Crafts.
Then I purchased the bins below from their Recollection line.
These were perfect for my space.
Plus the bins were deep letting me add bulkier items like fleece pajama pants.

Below are more organizers and space savers you can use:
- If you only keep a few shoes in this closet, try a small
shelf like this one. - Try these hangers designed for leggings/scarves and belts.
- Keep your shelves extra organized with these
shelf dividers. - Try these for keeping your stacked
clothing organized even if you pull an item from the middle of the stack.
And, if you’d like to go for that pop in your reach-in closet, try these lights.
You can hang them from above or on the back portion of your closet.
Final Thoughts on Optimizing Your Master Closet Space
Back in 2015, when I deeply purged and organized my closet for the first time, I sat on my bed with the closet doors open and stared at it for what seemed like an hour.
I couldn’t believe how minimal and clean my closet looked.
I actually felt peace as if a burden had been lifted and this is what I want you to feel too.
So remember:
- Really evaluate your closet for possible DIY or if you’d like to install a system
- Declutter and purge items you no longer want
- Reevaluate your closet again before doing any DIY
- Choose one of the design applications above and create your dream closet
- Add any organizers you feel your need and can help optimize the space

Leave a Reply