Creating a Serene Master Bedroom Through Decluttering and Organizing
I’ve always believed that one’s master bedroom should be the one room in your house where you can go for some peace and quiet. But too often, these rooms are filled with “noisy” clutter and can feel crowded with too much stuff.
In this post, you will find steps for creating a relaxing master bedroom that you may never want to leave.
First, you’ll start off by coming up with a plan that will fit your needs and style.
Next, it’s time to roll up your sleeves as you declutter, perhaps do a little DIY, and clean this space.
Then, you’ll follow your plan to rearrange and organize your bedroom for optimal comfort.
Finally, you’ll find some helpful products and tips for maintaining your room’s new look and feel.
Disclosure: This post contains some affiliate links for your convenience (which means if you make a purchase after clicking a link I will earn a small commission but it won’t cost you a penny more)! Click here to read my full disclosure policy.
Envisioning Your Master Bedroom
Getting a Feel for the Room
The first thing you’ll want to do is take a good look at your room and ask yourself:
- What do I like and do not like about my room?
- Is there just too much stuff? Does it feel crowded?
- Is the arrangement of furniture off?
- Do you find it overwhelming to clean and dust?
- When you enter your room, what kind of mood does it put you in?
Now, keep your answers in mind as we go over the next stage of this process.
Planning, Arranging, and Designing
The best way you are going to get the master bedroom of your dreams is to plan it out.
So, get a sheet of paper, preferably graph paper, a pencil, and possibly a measuring tape.
You can also use our free project planner ← by clicking here.
Or get our Total Home Workbook for all your home project needs which includes templates for a mood board, design worksheets, trackers, and more.
So, first things first: create a bare-bones sketch of your room without any furnishings.
If you plan on doing any DIY, go ahead and take measurements of your room’s dimensions and enter these into your sketch.
Try to keep everything to scale as you draw your room.
Include items that cannot be removed such as a walk-in closet as well as windows and doors.
You’ll also want to mark the locations of any electrical or cable outlets.
Playing With Your Floor Plan Design
Once you are done with your sketch, it’s time to add in your furnishings.
For this step, I like to use Post-Its in different sizes and colors.
This lets me play with the room’s arrangements much easier on paper.
No need to erase over and over when you change your mind.
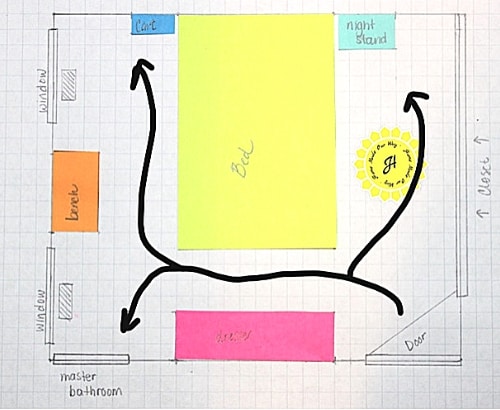
Again, try to keep your cut-outs to scale.
You don’t want to move a heavy object later only to find out you were off by 5 inches and have to redo your arrangement design.
Tips for Arranging Your Furnishings
As you move your furnishings around on your sketch, remember to take into account windows, outlets, and doors (include closet doors that open up to the room as opposed to those that slide on rails).
For some, placing the bed between two windows works well and for others, it may not depending on the length of the wall in between the windows and the size of your bed.
If your room is really small, placing the bed length-wise against a wall can open up much-needed floor space.
If you enjoy reading in bed, then an outlet and table for a lamp are a must on your side of the bed.
(Keep scrolling for a space-saving solution for this side of your bed.)
As you can see from my drawing above, my room has a good flow.
However, the space between my bed and the dresser is much narrower than I like.
In the coming weeks, I am hoping to get rid of the dresser.
Right now, it sits empty since I’ve purged and organized my clothes and closet.
I only use it for the mirror.
Update: I have since removed my dresser and repurposed it into a beverage station in my dining room.
Click here to read my → dresser to beverage station post.
Minimizing Your Clutter
Once you have come up with your design, it’s time to declutter.
You’ll need three boxes or large trash bags.
Assign one for donations, another for repurposing, and the other for trash.
By the way, it’s possible you may need to revisit your design if your decluttering is extensive.
Clothing
Let’s start with
Here are two posts you should read that will help you immensely with this part:
As you return your clothes to your dresser drawers and/or chest, see if you can consolidate them.
It’s possible that you may not need so much storage now.
This is what happened to me and is why my dresser sits empty.
Turns out I don’t need it anymore.
For off-season
I prefer to keep my off-season
This keeps my closet from looking stuffy.
Decluttering Your Surfaces
Next, are surfaces. This includes the tops of dressers, chests, and night tables.
In order for your room to have that ‘peaceful’ vibe, you’ll need to turn down the “noise” that comes with clutter.
It will also make cleaning and dusting your room a snap. And who doesn’t want that?
So, if you have lots of knick-knacks and photo frames on your surfaces, it is time to be selective.
Having tons of these items will only result in you having to dust them frequently.
In my opinion that is just more work that I don’t need.
Dealing With Knick-Knacks and Other Collections
Growing up in the ’70s, my family had a few Russ W. Berries figurines.
Just seeing them stirs up my nostalgia and takes me back to my childhood home.
However, those little statuettes are notorious for collecting dust.
And while I would love to own a few of these, I resist.
And one way I do this is by setting up a secret Pinterest board dedicated to these figurines.
In this way, they do not clutter my home and I get to enjoy “collecting” their image.
You can even share these boards with other collectors.
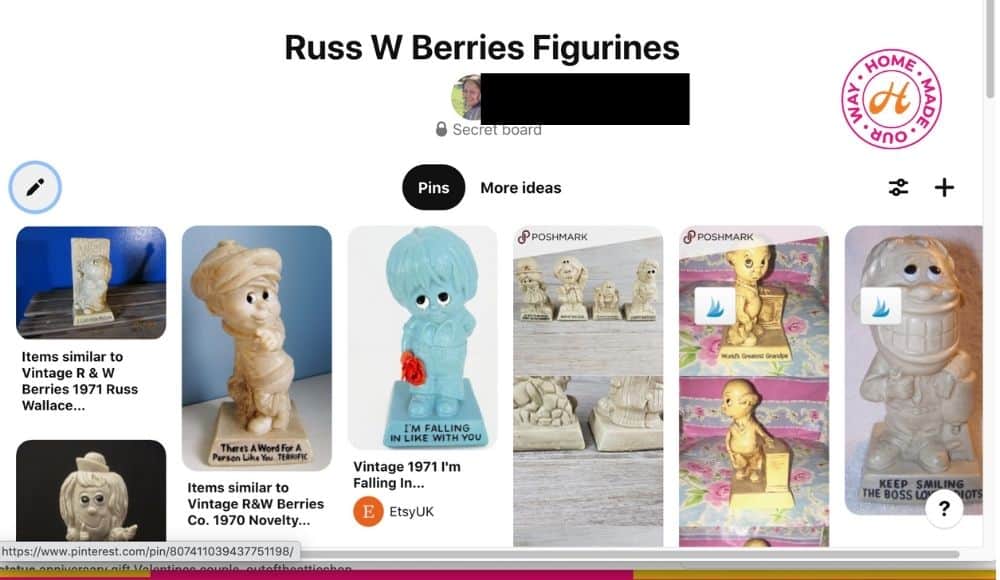
So, if you have knick-knacks or collections that are crowding your surfaces and require constant cleaning/dusting, my suggestion is to sell or donate them.
Then create a Pinterest board dedicated to your collection.
Not only is it possible to collect a pin showing “rare” hard-to-get pieces but they won’t cost you a thing either.
Dealing with Photos
When it comes to dealing with photos, less is more.
Personally, I used to have several photo frames on my dresser that I also had to dust periodically.
And as much as I treasured the people in those photos, I realized that they would eventually blend into oblivion.
That is, I forgot about them.
I didn’t look at them every day.
They basically sat there and only reminded me that my room needed dusting.
Now, I’m not saying to clear your surfaces of every photo frame but instead, be selective.
Pick one or two at the most and put the others away.
It is not disrespectful to your loved ones if you relocate their photo to an album.
And removing a photo will not erase them from your memory.
Another option is to purchase a digital frame <– like this one.
You can upload your photos which will display and rotate through your collection.
For more help with organizing photos <–click here.
Decluttering the Rest
Next, go through and declutter the rest of the items in your room.
This includes linens, jewelry, books, etc.
Try to keep ‘simplicity’ at the forefront.
For example, I bought a comforter set a couple of years ago and it came with sham covers, pillowcases, extra novelty pillows, etc.
What ended up happening was that my daily routine of ‘making my bed’ became an unnecessary long chore.
No, thank you.
So I eventually ditched the set with all those pillows and settled for a simple coverlet.
That’s it.
No pillows, nothing.
In the morning I place our sleeping pillows in our storage bench, fix our top sheet and coverlet, and done!
If you own lots of jewelry, invest in an organizer.
You can also click here to read → How to Organize Your Jewelry, where I go over some tips for purging pieces from your jewelry box.
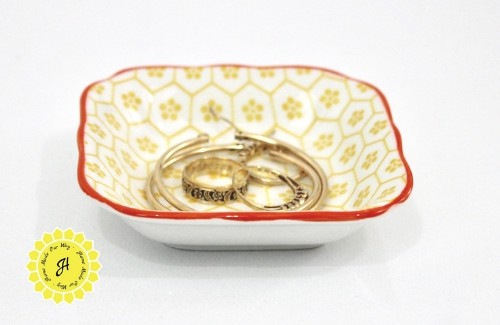
Who knows? You may not need that bulky jewelry box anymore. This little dish tray is all I use now.
Once you feel you have decluttered every inch of your bedroom, go back to your plan and make any changes especially if you were able to consolidate your storage spaces.
Time to DIY and Clean
After you are done decluttering, it’s now time to do any DIY you have planned and clean.
First, do all of your DIY tasks whether this is painting your walls or simply putting up some shelving.
Then start cleaning.
Looking for calming colors for your bedroom? Check out these 6 calming colors that can reduce your stress.
Here are some cleaning tasks you should do to create a nice smelling and airy retreat along with links to some products for getting the job done:
- Clean your windows including the sills
- Dust your blinds/wash your curtains
- Remove any cobwebs and dust from the ceiling, ceiling fans, and walls
- Dust any wall decor including photo frames
- Dust and polish your furnishings including items on their surface
- Sweep and mop the floors/vacuum carpet including under the bed and under/behind furnishings
- Wipe down any mirrors
- Wash your bed covers if it’s been a while
Now, just from cleaning and dusting, your room should smell clean.
But you can add more scents if you prefer.
Keep fresh flowers in your room or try this scented candle.
Once you are finished, return to your design plan because it’s time to start rearranging your furnishings.
Rearrange & Organize Your Master Bedroom
Hopefully, if you can consolidate a lot of your clothes, you can get rid of any extra storage pieces from your room.
This includes furnishings and perhaps other bins and baskets.
Follow your design plan for optimal flow and floor space within the room.
However, if you need some ideas on how to rearrange your furnishing for ultimate calm and peace, check out this article that uses the Korean style of organizing your home including the master bedroom.
If you have a free-standing closet or armoire, use the tops to hold baskets where you can keep extra blankets or off-season
I mentioned this earlier but also use the space under your bed if possible.
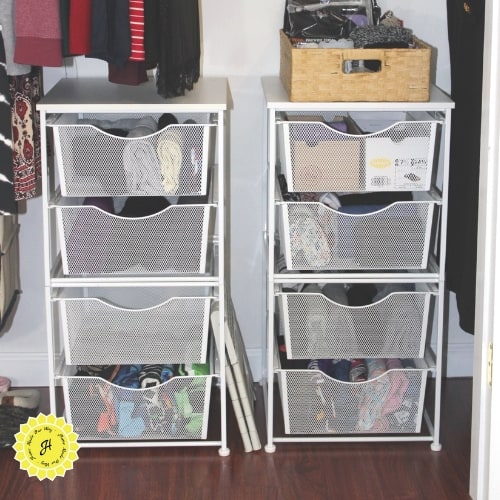
If your closet space allows, you can also store a small set of drawers like those in the photo below to hold shoes, accessories, and other small
I purchased these in Michaels.
Helpful Organizers You Can Use
Below are organizers you can use to better store your items.
Gain more space when you use these first three items below and ditch your nightstand.
Final Thoughts on Maintaining Your Bedroom’s Feel
So, now that your master bedroom is finally tidy and just the way you like, it’s time to talk about how to maintain it.
The first rule of organization is to always put things back where they belong.
I know how tired one can feel at the end of the day, but resist putting off these tasks until the next morning.
By the end of the day, make sure your clean laundry has been folded, hung, and stored away.
Place dirty clothes into a hamper, store your shoes away, and make sure your surfaces remain clutter-free.
This way, you don’t wake up to a mess.
Go through your
Try to keep things like decor simple.
The more stuff you bring in, the more cleaning and organizing you will have to do.
If you share this room with a partner/spouse, go over how you want the room kept even if this falls on deaf ears.
Hopefully, they will be considerate of your time and efforts.
To make your room especially calming, remove the TV.
Instead, read a book.
Also, avoid dark curtains.
Waking up with the sun streaming into the room can be so refreshing.
Or maybe that’s just me.
Helpful Articles for Your Master Bedroom
Below are links to articles mentioned in this post to help you organize your master bedroom:

Hi, Why did you feel the dresser had to go and keep the bench.? My layout is so similar, no wall of closets though. just the basic one door and what you see is what you get. My closet door would be where you have built your vanity. I would love to reverse things and have the bedhead under the windows, but they are off centre and I cant get my head around that, but know it looks ” quite good” But I’m not sure, any ideas? I need to keep my dresser. Thanks Maureen.
Hi Maureen,
While I did replace the dresser with the bench, the bench is not as bulky. The pathway to the master bathroom and the other side of the bed is now a little more open.
I got rid of the dresser because I didn’t keep any clothes in it. I had decluttered my clothing to the point that all I needed could be put into the closet. I really didn’t need the extra storage and now I don’t have to dust that big dresser and all the things I kept on it. I’ll have to take pictures and update this post so you can see it now.
As for your room, I would play around with different arrangements and see what works for you. Try putting the bed between the two windows and see if you like it despite the imbalance of the windows. If after a couple of days and it seems off, then try another arrangement.
By the way, I did repurpose that dresser. It is now my coffee station/kitchen and dining room storage unit. Here is the link if you’d like to see that DIY: https://homemadeourway.com/old-dresser-into-a-beverage-station-more/
Dionne