I don’t know about you, but I’ve had a love-hate relationship with my deep chest freezer for years.
It’s great when you need that extra space for the Thanksgiving turkey or when you need to stock up on the latest frozen pizza sale.
But when I need to find an item or worse, try to pull out that whole frozen chicken at the bottom, I just want to scream.
That is, until I found a way to avoid those headaches.

Disclosure: Some of the links below are affiliate links that I have provided for your convenience. Click here to read my full disclosure policy.
If you have a deep chest freezer that you love but sometimes hate, I get it.
Below, I will give you the steps and tips you need to:
- empty and purge your freezer
- defrost, drain, and clean your freezer
- and finally, organize your chest freezer the easy way
Cleaning Out Your Chest Freezer
Emptying Your Freezer
I find the best day to clean and organize your deep chest freezer is the day before a big grocery shopping trip.
This way, the refrigerator/freezer has fewer items.

So, before you begin the steps in this post, make sure you have room to relocate your items.
If you don’t have the room to put everything in your refrigerator’s freezer, that’s ok.

Place bulky meats, such as a whole chicken or roast, in the refrigerator instead.
They won’t have much of a chance to defrost.

Save your refrigerator’s freezer for items like ice cream that can easily melt in the refrigerator.
If you just have too much, consider using a cooler (filled with ice, of course).
Borrow coolers from friends and neighbors, if need be.
When your chest freezer is empty, go ahead and unplug it.

Don’t just switch it off, pull the plug.
It’s better to completely disconnect your freezer to prevent any possibility of electric shock.
Then allow some time for it to defrost.

Examining and Purging Your Freezer’s Contents
As you relocate your frozen foods, check each item to see if it is still good.
If it looks or smells funny, toss it.
Freezer-burned food is safe to eat, but personally, I would get rid of it.
It’s up to you to decide.
If you are uncertain how long you should keep frozen foods, click here for the FDA’s food storage guidelines.
Use these guidelines to help you decide what needs to go and what you can keep.

Draining Your Deep Chest Freezer
Once you’ve relocated all your foods, remove any baskets, bins, or dividers.
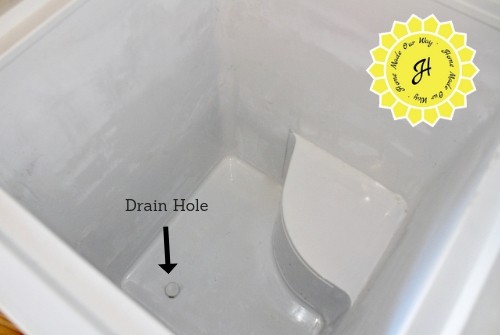
When your freezer has defrosted, you will need to drain any standing water.
Follow your chest freezer’s recommendations for draining it.
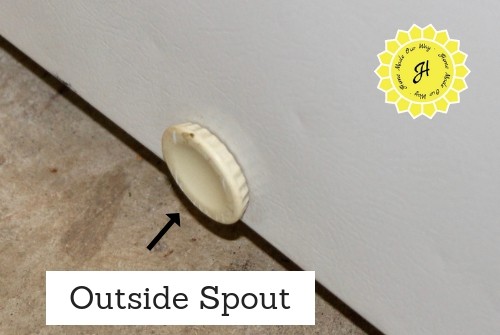
In case you don’t have the manual, look for a spout on the outside of the freezer where you can connect a garden hose to it.
Others, like my own, only have an opening (capped) and no way to attach a hose.
We keep our freezer in the garage, so draining our freezer isn’t a hassle.
However, if your chest freezer is located in the home, you may need to either move the freezer outside to drain it or sop up as much water as possible with towels rather than opening the spout.
Note that not all of the water will drain, so you will still need to use some sort of towel to absorb the rest.

For Small Chest Freezers:
Because I’m short, I usually tip the chest freezer onto its side to clean it properly.
It’s really the only way I can reach the bottom of the freezer.
You are not supposed to do that because it displaces the oil in the compressor.

However, if you can clean the freezer quickly, do so and then stand it upright again.
If you had it tipped for 30 minutes, then let it stand for 30 minutes before plugging it back in.
If you had it tipped for 1 hour, then let it stand 1 hour before plugging it back in.
You get the picture.
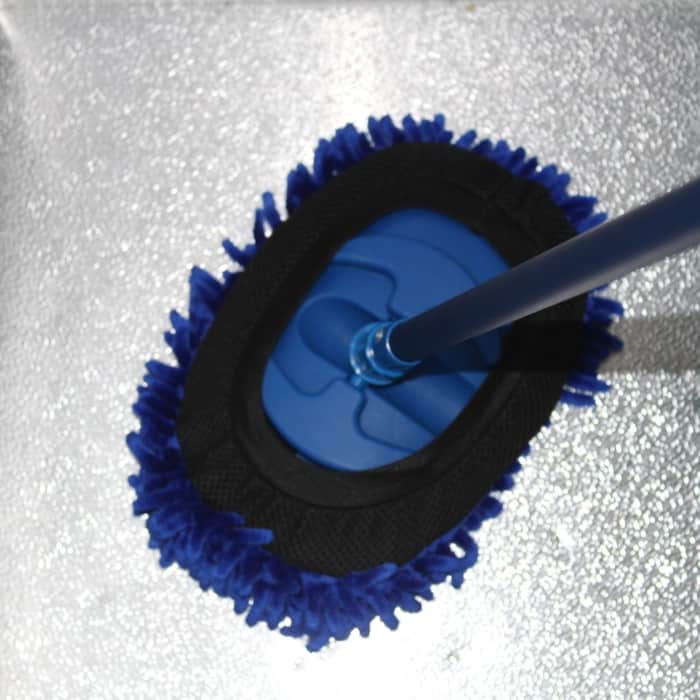
2023 Update: This year, we purchased a larger chest freezer and realized that tipping it wouldn’t be a good idea.
Instead, I purchased a telescoping car scrubber (seen below), making it so easy to clean the inside of the freezer.
Homemade Cleaner Recipes You Can Use for Your Freezer
If your freezer requires some serious cleaning, I suggest this recipe:
- 3 cups of baking soda
- 1 tablespoon of dish detergent
- enough water to create a paste
Slather the inside of your freezer with the paste above. Then spray with vinegar. Let it sit for a bit.
Use a scrub brush if there are any stubborn stains.
Next, with a wet cloth (I recommend using a hand towel), begin wiping down the inside of the freezer until you have collected all of the paste. Then, use a dry cloth to wipe down the surfaces.
If your freezer just needs a little cleaning, use this recipe:
- 1 cup of vinegar
- 2 cups of water
- about 2-3 drops of dish liquid
Mix the above ingredients into a spray bottle and spray the inside of your freezer. Then wipe down with a damp cloth.
Once your freezer is cleaned, go ahead and plug it in.
You will need to wait a bit for the freezer to be at the ideal temperature before returning your items.
This may take a while, so in the meantime, go ahead and clean those removable baskets and bins.
You can use any of the recipes above on them as well.
My Favorite and Free Organizers
Accidental Repurposing
The following is how I came about creating my organizers.
Not only did it not cost me a thing, but it kept my freezer clean.
Oh, and it makes it easy to remove heavy food items like that whole chicken.
So, what am I referring to?
I repurpose reusable wine bottle bags that I get for free from my grocer.
For a while, I was getting free wine bottle bags from my grocery store.
These cloth bags come with 6 divided pockets for small wine bottles.
While I liked receiving these bags for free, I started to accumulate them because I forgot to bring them with me whenever I shopped for wine.
And because of the pockets, I really didn’t have another use for them.
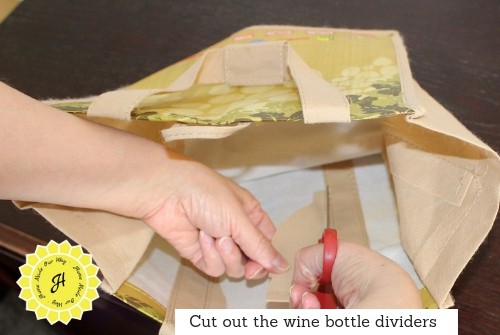
One day, I decided to cut out the dividers so that I could reuse them for all my grocery shopping.
And this worked.
Soon after that, while running late from grocery shopping, I shoved the bags that were holding my frozen foods into the chest freezer until later, when I could put my food away properly.
When I returned home, I immediately went to the freezer to remove the bags to put the items away in the very same freezer.
I can’t tell you how nice it was to remove the whole bags of food effortlessly.
Then came my lightbulb moment.
Keep reading below to see how best to organize your freezer with wine bottle bags.
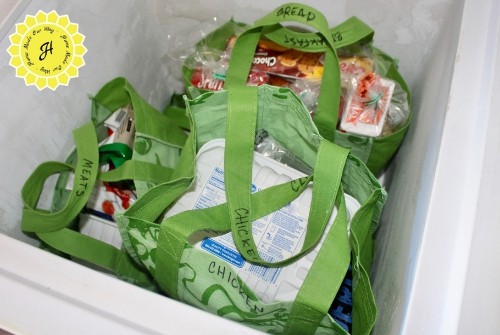
First, Sort Your Foods
What you will want to do is sort your food.
Personally, I sort them by chicken, other meats, potatoes, snacks, bread, and breakfast.
I suggest sorting whichever way makes sense to you.
Sorting your food will also help you determine how many bags you may need.
If you have wine bottle bags, go ahead and cut out the dividers.
You can also use regular reusable bags, but make sure they are washable.
Next, fit your sorted foods into the bags.
Then label the bags.
You will want to label the outside of the bag on either side and, most importantly, on the bag handles.
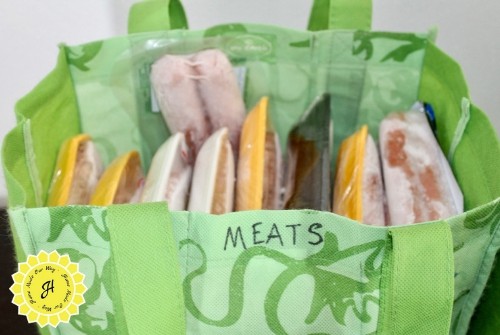
This will help make finding what you need so much easier.
Oh, and I no longer need any of those organizing baskets.
Getting rid of the basket actually freed up my freezer space even more.
I no longer had to wrestle with it when placing something weirdly shaped like a whole turkey.
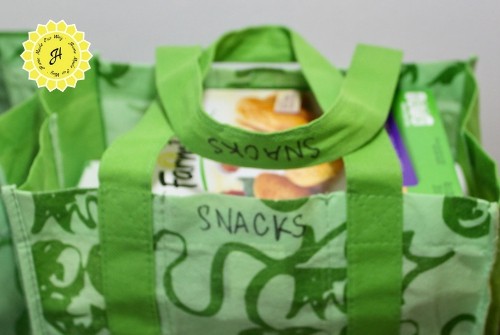
Below are pictures of my deep chest freezer with two layers of bags.
And I still have room for more.
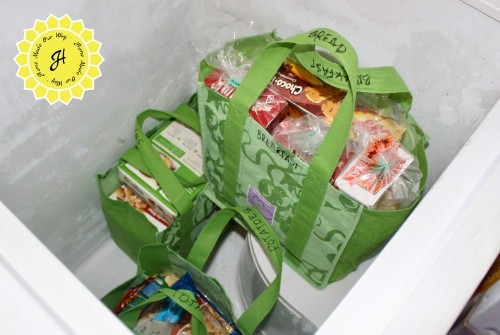
Make sure to lay the bag handles on top of the bags instead of letting them fall to the sides.
Whenever I put the bags in, they do this automatically.
This will make finding the handles easier.
And because I label the handles, I avoid pulling out a bag I don’t need.
2023 Update/Reader’s Tip
I had a reader who loved the above method for organizing her food.
However, she took it to the next level of organization.
She purchased different colored bags and sorted her food accordingly.
Such a clever way to avoid having to label bags, and it makes it even quicker to find your bags.
Maintaining Your Deep Chest Freezer
Now, because I use these bags, my freezer stays relatively clean, and I only clean it once a year, mostly to remove any ice/frost buildup.
If you decide to use this method, you will see what I mean.
Also, once a month, I replace all the bags.
I toss the used bags into the wash with my kitchen towels and reuse them the following month.
Easy peasy!
These bags are normally 99 cents, so if I see bags getting frayed from washing and use, I don’t mind shelling out a buck here or there for a bag.
It’s worth it just to keep my freezer clean and to make it easy to remove my food from the deepest part of my freezer!
Need help cleaning and organizing your refrigerator as well? Click here to get started.


This is great. We did ours in two steps, organizing in bags and then a later day, defrosting. It made the process easier now AND in the future. Thank you.
That is great, E! I love easy!
Such a great idea.
I use this same method. My cousin, Tony ran across some bags from Tractor Supply. He bought everyone of us some… (Family Joke there) So I was wondering… what am I going to do with these 10 bags that I received.. My son and I decided to tackle cleaning the chest freezer and this is where I use them. I feel so organized. LOL
That’s great, Gail! I love this method. So easy to get something from the bottom, keeps the freezer clean, and is budget-friendly. Win, win, win!
I’m going to switch to this method. What a great idea! I have plastic organizers now, and once cold they crack so easily. This is perfect! Thanks!
Oh my goodness! This is genius! Thank you so much!!!
I use a clean dust pan as a scoop. I find that I only have to leave my freezer unplugged for a short time, maybe an hour or so and any frost on the sides will easily separate from the sides of the freezer and fall to the bottom. ( You can use the dust pan to encourage it to loosen and fall in large chunks.) I then just use the dust pan to scoop up the frozen chunks and slush from the bottom and dump it into a plastic dish pan or bucket that I set on the freezer floor. I empty that into a sink to finish melting. I have very little water to dry from the bottom this way. Also since it is open and turned off for a lot less time, I don’t have to worry about the contents that I removed thawing. The whole process is a lot shorter for me. I hope this helps someone.
Hi Connie,
Great tips! Thanks for sharing!
I love this reusable shopping bag method. I am definitely going to put this to use upon my next reorganization this spring when I thaw my freezers out. I currently use the box method (I despise plastic). I create handles on the boxes to lift in and out of my chest freezers. With this bag method the handles are already there. I still believe in the box method so for squaring off I will use boxes that fit within my bags. We had an outage in our area and the boxes truly saved our frozen food. My neighbor lost most of theirs due to loose storage. The bags will give that additional insulation.
Thanks, I’ll file this under … wished I would have thought of that.
Hi Lisa! I’ll have to try the box method/bag combo. If anything, it will help with keeping the bags in a rectangular shape for a better fit in the freezer.
Do the bags ever get frozen on the bottom?
Hi, Lynda! I have been using this method for years now and the bags have never stuck to the bottom or sides. However, I can’t say that they won’t if you freeze liquids. If there is a leak, there’s the possibility that it will stick. My recommendation is to freeze liquids in your refrigerator’s freezer then transfer it to the chest freezer. But keep an eye on it if you lose power.
I have used a wet/dry vacuum to vacuum out all the water, I first pick out the bigger chunks of ice. The vacuum almost totally dries the I side also. I am only 5’1″ so the added length helps me reach.
That’s a great idea, Lynn, especially for those of us, who are vertically challenged! I’ll add this to our next update.