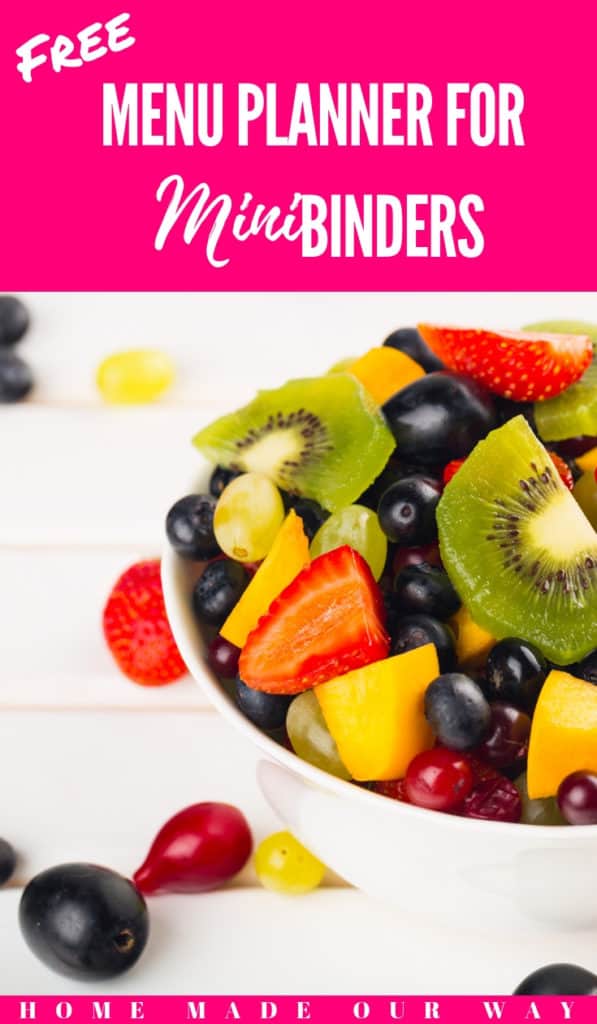
Looking for a menu planner small enough to fit in your mini planner or binder?
How about something simple to use, customizable, and reusable?
Disclosure: Some of the links below are affiliate links that I have provided for your convenience. Click here to read my full disclosure policy.
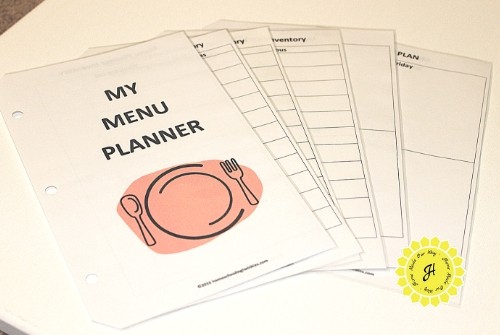
Menu Planner
After creating my mini planner recently, I wanted a menu planner that would not take up much room in my already small binder.
This menu planner is not only compact and easy to use, but you can use it over and over again.
Check it out below.
So, does it work?
I’ve been using it now for several weeks to get a feel for it and see if anything needs changing before offering it to you.
I found that it takes about two minutes to use after my weekly shopping trip, five minutes for the actual meal planning for the week, and one minute a day to adjust the planner after every meal.
This is how simple and easy it is to use.
Materials
Ready to get your free menu planner?
Well, let’s make sure you have everything you need before printing.
Using a Binder
To be able to use this in your mini binder, you’ll want to make sure you have some sort of adjustable or handheld hole punch.
If you don’t have a mini binder, you can always use loose binder rings like these.
In this way, your menu is kept together, and you can easily hang it off a
Reusable Menu Planner
If you want to be able to reuse your menu planner pages (highly recommended) then you will need to laminate these pages.
If you don’t have access to a laminator, you can purchase self-laminating pages or take them to an office supply store and have them do this.
Menu Planner Sheets
I created these sheets so that you can print on both sides to save paper.
I usually only plan my dinner, so if you are going to use the menu planner for more than one meal, I suggest printing more of the inventory sheets.
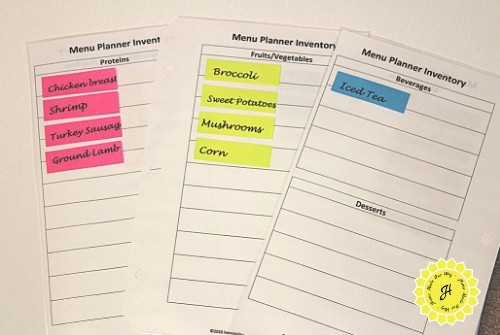
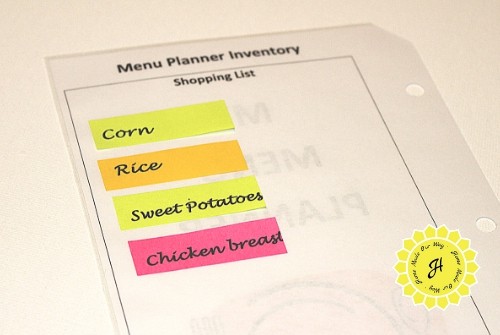
Inventory/Shopping List Sheets
The first few pages of the menu planner consist of the inventory sheets as well as a shopping list page for when you run out of an item.
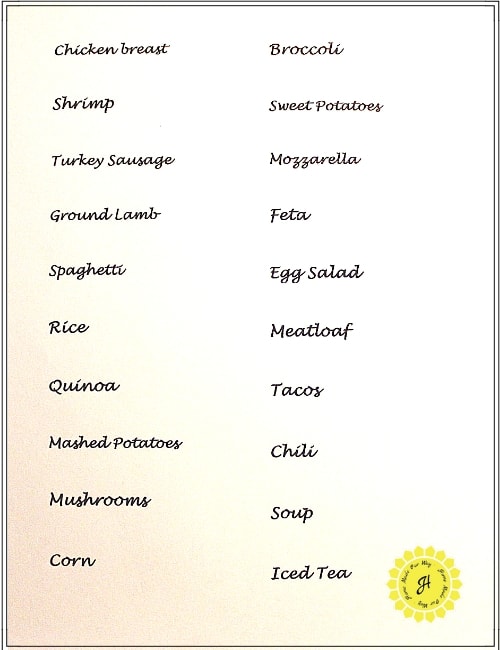
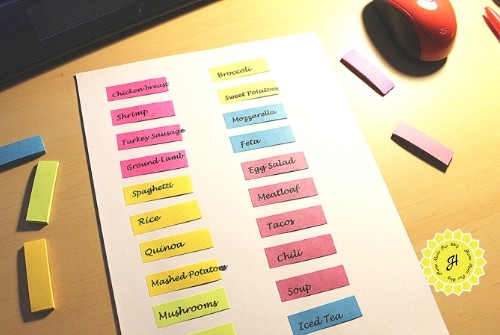
These sheets are divided into proteins, grains, rice, pasta, and potatoes; fruits and vegetables; dairy; miscellaneous; and lastly, beverages and desserts.
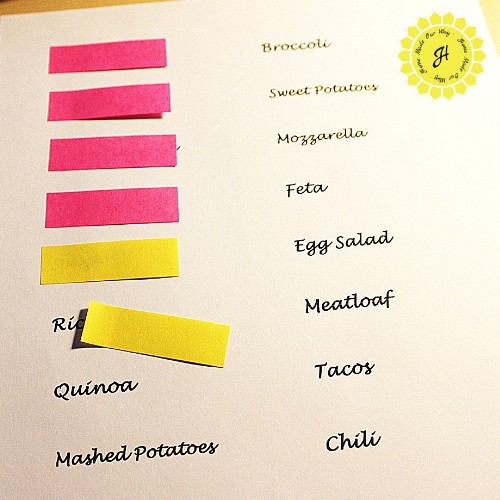
Using Post-Its colorful page markers, I use a different color for each category.
This makes finding and relocating items easier to manage.
Creating your inventory for the first time will probably be the only time-consuming part of using this plan.
After that, it should only take you a couple of minutes to adjust your inventory each week, preferably after you’ve done your weekly shopping.
*See below on how to make your page markers pretty.
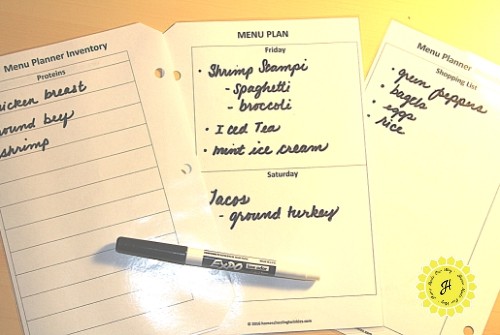
Daily Plan Sheets
Your daily plan sheets will consist of two days per side.
On the last sheet is a rainy day/leftovers section, which you could use to plan a backup meal.
So, if you are supposed to barbecue and the weather doesn’t allow for it, you can easily switch it out.

Now, if you don’t want to use Post-It page markers, then you can also use a dry-erase marker and write in both your inventory and meals as I have done below.
I recommend using dry-erase markers with a fine to ultra-fine tip.
Tip: When planning my meals, I personally like to take out all my sheets and lay them before me.
This way, I am not constantly flipping back and forth in my binder.
Pretty Page Markers
To create these pretty page markers, you will need to get your inventory list ready.
In your word processor, format your document with narrow margins and two or three columns.
Choose the font that you like and make it bold.
I used Lucida Handwriting.
For foods that are 13 characters or less, including spaces, I went with a font size of 18.
In the photos below, you can see where some of my longer food names, like mashed potatoes, went beyond the page marker.
To avoid this, go with a size 16 font, and it should work.
Lastly, you want to double-space your page to leave room for your page markers.
After printing out your inventory items, do not close out your document.
Next, take your page markers and cover each item with your preferred color as neatly as possible.
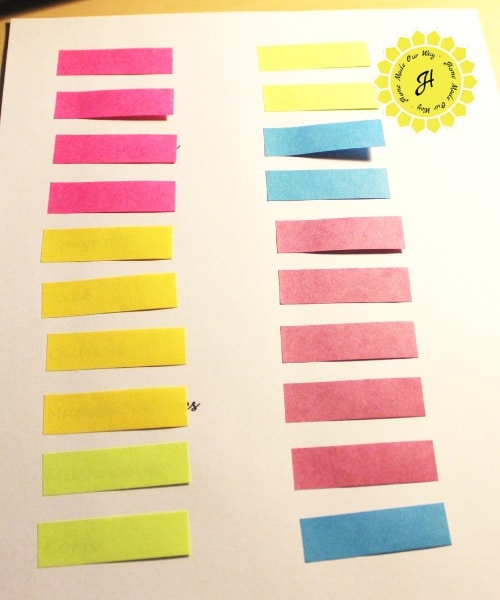
When you are done, place your list back into your printer feeder/tray so that it will print on the same side of your written page when it reprints.
Hit print again, and voila!
Your page markers will be pre-printed with your food items.
Now, eventually, your page markers will get worn out as you continue to use your menu planner, so save your document on your computer.
Update: I’ve been using my page markers for a year now, and I have yet to replace them.
Ready? Print!
Before you click below for your free mini-menu planner, don’t forget to check out my other free mini-planner pages:
Click the button below to access your mini menu template.

Leave a Reply