Organization Ideas For Setting Up a Homeschool in Your Home
Looking to set up a homeschool room in your home?
Is your homeschool disorganized and dysfunctional?
Or maybe you just don’t have a dedicated room for one.
Not to worry.
In this article, you will find organizing ideas and tips for turning a room or space into a functional learning center for your kids.
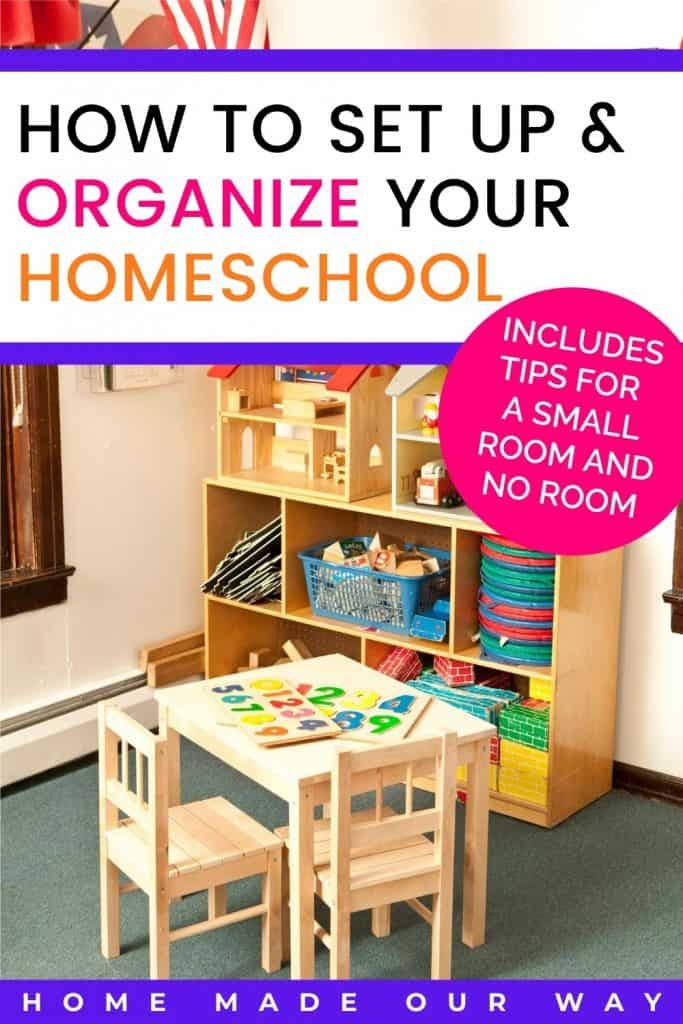
Below I detail all the ways you can set up your kids’ classroom school whether you have a large room, a small room, or no room at all.
However, before you start purchasing anything or DIYing a space for your homeschool, I suggest putting a plan in place first.
Take good measurements of the room including all usable wall space.
Then use this article to help you come up with the best plan for you and your family.
Disclosure: This post contains some affiliate links for your convenience (which means if you make a purchase after clicking a link I will earn a small commission but it won’t cost you a penny more)! Click here to read my full disclosure policy.
Large Room Homeschools
Creating Room Sections
If you are lucky enough to have a large homeschool room, consider sectioning it off to keep distractions to a minimum.
This is especially helpful when you have children in various grades.
Below is a list of areas you can consider adding to your room other than the main instructional setting:
- Play area (for Pre-K and K classes)
- Reading area/nook
- Art Studio
- Music Corner
- Science Lab
When considering areas for play, art, and music, you’ll want to place them as far away as possible from the instructional and reading areas of the room.
You may want to section off your homeschool into grade groups if there is a large gap in your children’s grades.
For your reading area, make it a comfortable space by adding rugs, pillows, and/or beanbag chairs.
But also make sure to provide a way to keep books in this area organized. (Keep reading for options on organizing books).
If you have space, set up a small science lab where you can keep all your science equipment and tools as well as a small table for experiments.
You can also use a cart like this one.
We have a FROG (Finished Room Over the Garage) that we turned into our homeschool.
While it is roomy, we also use it as a family room too.
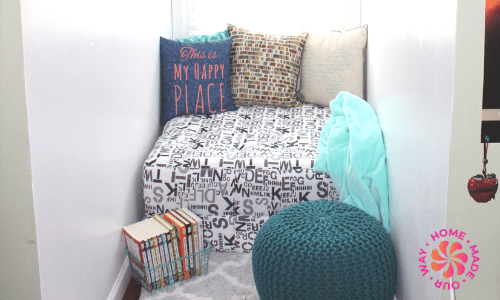
Below, we were able to section a small nook into a reading area.
If you’d like to do the same, click here and check out our reading nook DIY.
Small Room or No-Room Homeschools
If your homeschool is on the small size, then simple space-saving options should help make the most of this room.
For those who cannot spare a room for homeschooling, you will mostly rely on portable solutions.
However, do not feel that your only option is the dining room table.
Below, check out some alternative ways you can homeschool your child without a dedicated room.
Wall Space
Below are items that typically take up wall space.
I have laid out some recommendations and suggestions for these items and how to best place them on your walls.
Whiteboards and Bulletin Boards
For a Large Room
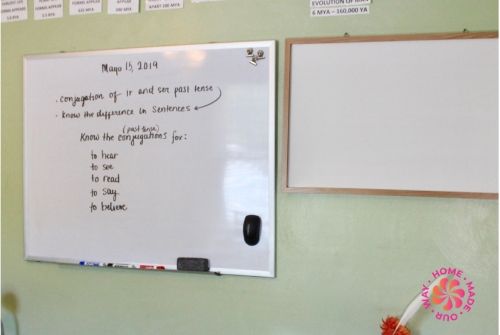
If you have a large homeschool room, invest in a large magnetic whiteboard.
These can be a bit pricey but hopefully one is all you will ever need.
If you are going to use this board on a daily basis, then you will want to place it so that your children do not have to twist around or strain their necks to see it.
For a Small Room or No-Room Homeschool
For smaller homeschool rooms, I suggest taking measurements of the space where you want to place your board before purchasing it.
If there just isn’t a way to place a whiteboard on your wall, try Post-It’s Team Work Tools.
It comes with various products you can use for your homeschool including mini easels you can easily hang on your wall and remove when not in use.
Another option is using a magnetic whiteboard easel like this one that folds away when you are done.
Maps, Educational Posters/Banners, Photos of Historical People, and Quotes
For Large Rooms
If possible, keep these items laminated to avoid wear and tear since they may stay up on your walls for a while.
You will also want to keep maps accessible and low enough for students to be able to interact with them.
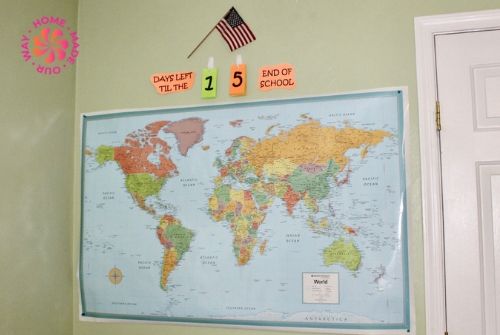
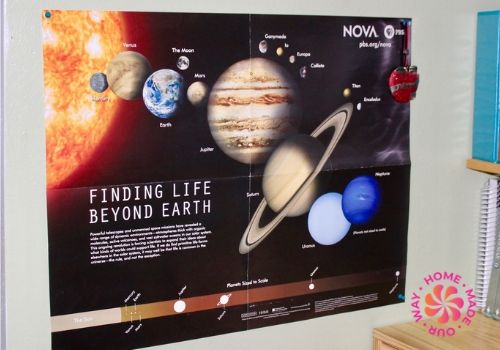
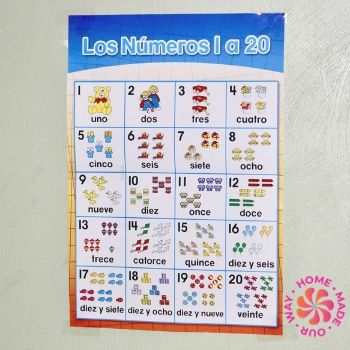
Place smaller educational posters at eye level and larger ones toward the top of your wall.
The placement of historical people photos and quotes are up to you but I suggest using them as fillers.
That is, hang them where you know you won’t need that space for instructions or other important information.
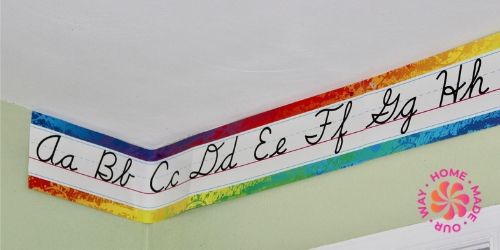
An alphabet banner can be kept high up on a wall.
In fact, I would set them just below the ceiling since they are more for reference than actual instruction.
For Small Rooms
Use the same instructions as above but just use smaller versions of the items like this map here.
You can also nix educational posters and/or photos of historical people.
Instead, use the alternative that I provide for no-room homeschools below.
For No-Room Homeschools
For maps, you can simply use an atlas.
However, I suggest creating a reference binder as opposed to putting up an alphabet banner or other educational posters.
For example, if your child is in kindergarten, create an alphabet page or math operations page, place it in a page protector, and keep it in a binder.
It’s portable and they can reference it when they need help with their work.
Timeline
Large Room Homeschools
If you decide to add a timeline, count on it taking up a lot of space.
The placement of your timeline is up to you and the actual space you want to add it to.
If you want it to be interactive, I suggest placing it on your wall at eye level.
Small Room and No-Room Homeschools
For small rooms and no-room homeschools, I do not recommend putting up a timeline on your walls at all.
Instead, I recommend these two options:
- You create a timeline binder
- Do what I did six years ago and purchase History of the Ages’ Record of Time.
After trying to put together a timeline binder, I simply gave up and purchased the Record of Time.
It is a bit pricey and you’ll have to purchase the timeline figures separately (CD) but it was well worth the investment.
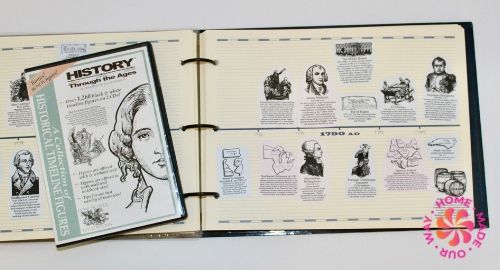
The boys have had their binders now for six years and they have yet to accidentally rip a page.
The paper is made from durable card stock that has kept it intact for years.
Other Items: Artwork, Clocks, Flag, Calendars
Large and Small Homeschool Rooms
The placement of the above items is entirely up to you.
You can frame some artwork and hang it up throughout the home.
You can also hang some string like a clothesline and use clothespins to hang art pieces up against a wall or high up near the ceiling.
The placement of clocks is also entirely up to you.
If you think it’s going to be a distraction, you can keep it off the walls and/or out of your children’s line of sight.
A regular-sized flag (5′ x 3′) can take a large portion of a wall.
Instead, opt for a smaller flag like this one.
If you prefer that your kids date their school work, place a simple monthly calendar where they can see it.
No-Room Homeschool
You really do not “need” any of the above items.
You can replace the clock and calendar with a smartphone.
I suggest hanging up some art pieces throughout the home and keeping the rest in a large portfolio like this one.
Organizing Books and Binders
Large and Small Homeschool Rooms
The best way to keep your books and binders organized is by adding a bookshelf or cubby units.
You can use these pieces to house your teacher’s editions, student textbooks, and student workbooks.
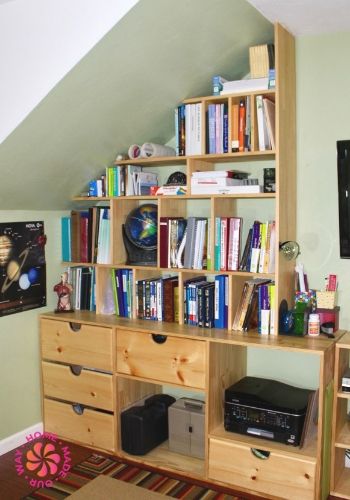
Here my husband created this bookshelf to accommodate the sloping wall in our FROG.
Label each
You’ll also want to label your binder spines.
If you have a separate reading area then simple wall shelves will work.
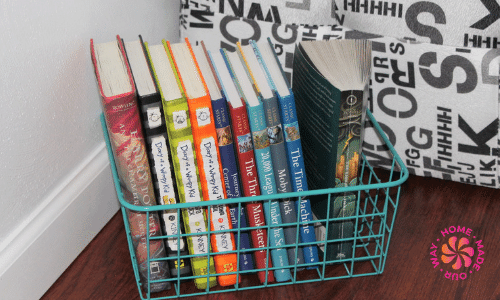
For chunky board books consider crates, plastic bins, and even a basket like the one below to hold them.
If space is really lacking, take advantage of unused corners and go up instead.
Last year, my hubby and I created a corner bookshelf for my son who reads lots of books.
It really saved a lot of space and it holds lots of books.
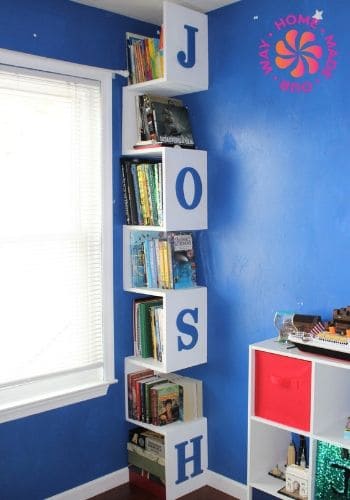
Click here to check out our DIY for this corner bookshelf.
No-Room Homeschool
The best place for children to keep their books is in their bedroom.
Set up a way to organize books in their room.
Then if they need a specific book for class, they simply just need to get the book and bring it to whichever room you plan on doing your homeschooling.
For teacher’s editions, you can keep these in a portable tote like this one along with other supplies.
These are really roomy and can hold a lot.
Desks and Writing Spaces
Large and Small Room Homeschools
If you can afford desks with storage, do so.
These will not only give your child a place to do their writing assignments but can also store their school supplies.
The same goes for your own teacher’s desk.
If individual desks are not in the budget or will take up too much room, consider using a long foldable picnic table.
If you have more than two kids, a long table will work well for providing enough surface space for everyone.
Also, you may want to consider placing desks up against a wall for more open space.
However, make sure they are light enough to move around so that your student is facing you during instruction time.
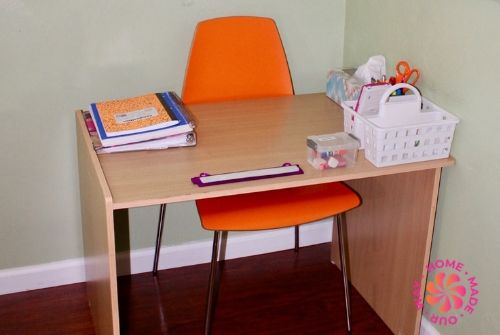
This may mean getting drawer-less desks like ours here.
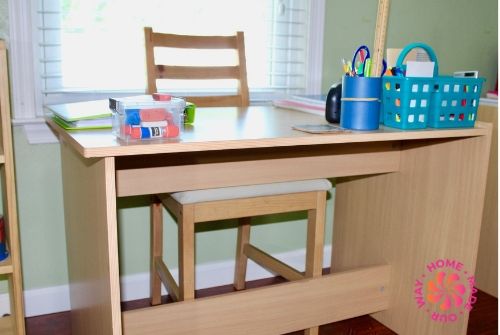
These desks came with our boys’ loft beds. We attached felt pads to the bottom of the desks so that they glide easily over the floor.
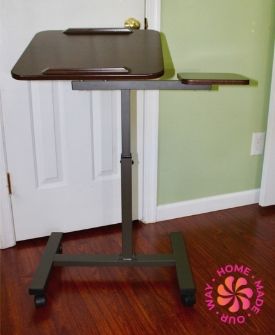
As for a teacher’s desk, I use one like this.
It’s light and I can move it around the room and stow it away after school.
One hack you can try is adding casters to a small table to turn it into a mobile desk.
No-Room Homeschool
Naturally, when it comes to writing assignments, you will want to use some sort of table.
For this reason, the dining room and sometimes the kitchen is usually the most preferred place for parents to homeschool.
However, it is not your only option.
You can also use portable writing surfaces like this one that kids can place on their laps in any room.
This is especially convenient when you have multiple kids and not enough surface space on your dining or kitchen table.
School Supplies
Large and Small Homeschool Rooms
As I said earlier, if you have desks with drawers then all you will simply need are drawer organizers like these to help keep pencils, pens, markers, scissors, erasers, and other school supplies organized.
However, if your desk did not come with drawers, then simple desk surface organizers like these will help keep school supplies corraled.
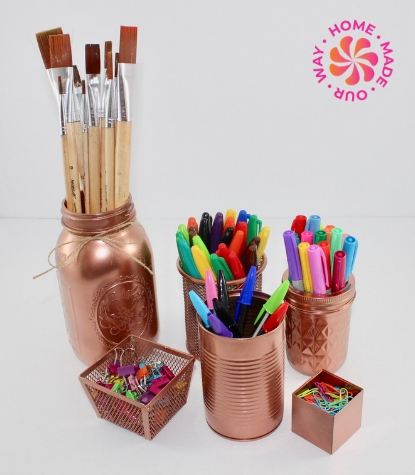
You can also repurpose many household items as I have done below with various containers I had around.
I just spray-painted them to match.
No-room Homeschool
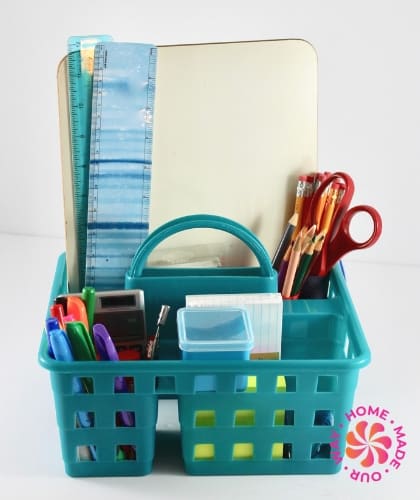
The best option for holding school supplies when you don’t have a dedicated room is to use a portable caddy like the one below.
You can find these caddies for cheap in dollar stores and in Walmart. The same goes for teacher’s supplies as well.
Manipulatives and Instructional Tools
Large Homeschool Rooms
Manipulatives and instructional equipment tend to be somewhat bulky and are the reason why I prefer using drawers.
So if you have the room and means consider purchasing a piece that has drawers like a dresser or chest.
Items like a microscope, scale, or globe can be kept on top of or in bookcases.
Small Homeschool Rooms
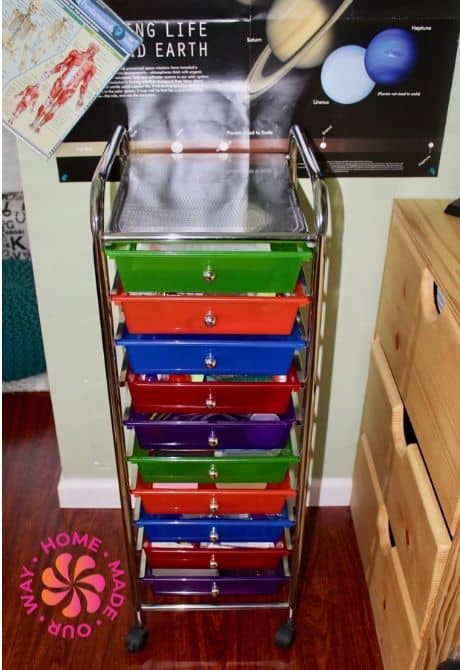
For smaller spaces, you can also use something like the carts below that have multiple drawers.
These are great for smaller pieces.
No-room Homeschool
If it is possible, find storage around the home to house these items.
This can include the bottom of a china cabinet.
This can be especially convenient if you are using the dining room as the primary spot for homeschooling.
And if it isn’t an eyesore, keep some bulky science equipment on the tops of large cabinets including an entertainment center and any tall bookshelves.
You can also use these popular utility rolling carts to put together all the tools and supplies needed for the week.
Paperwork and School Records
Before you begin storing any type of paperwork, I suggest calling your local school board to find out what kinds of records you are required to keep as a homeschooler.
Different states and even cities have certain requirements as proof of your child’s progress.
So, find out first so that you are not throwing away any documents you need and you’re not storing any documents that you don’t need.
Click here to find your local homeschool association.
They should have this information in case contacting the school board is a hassle.
Banker Boxes
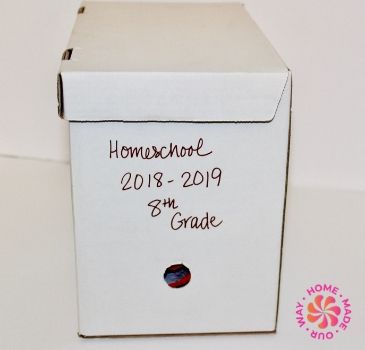
Every year, I use one half-size banker box to store all my homeschool documents.
I do this for two kids.
So, if you have three or more kids and you are required to keep things like workbooks, you may need more than a full-size banker box.
Again, find out what your district requires as well as how long you must keep these documents.
Textbooks/Workbooks
Textbooks are expensive so you’ll want to keep any if you plan on teaching another child the same subject in the coming year(s).
If not, you can find lots of homeschool exchanges online where you can resell your materials.
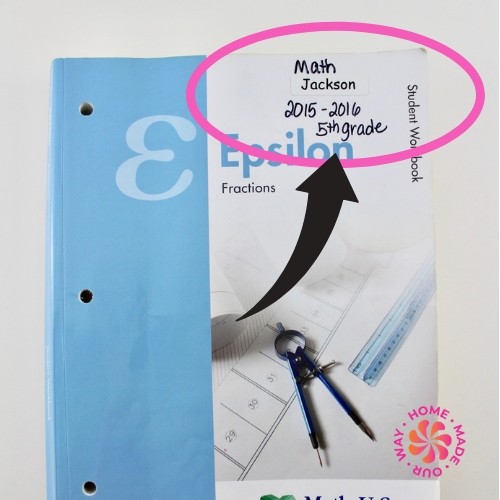
If your state requires that you keep workbooks and/or notebooks as proof of progress, just write the name of your student on the cover, the year, and the grade.
Then place it in a labeled banker box.
Keep your banker boxes stored away in a dry location. Avoid basements.
Everyday School Work
For loose paperwork on a daily basis, I suggest using binders.
My sons have their own binders where they insert assignments like essays, loose worksheets, and tests.
Now if you don’t have the space for a bookshelf to hold things like binders, workbooks, and notebooks, you can also use plastic milk crates.
They come in lots of colors so you can assign a crate(s) to a particular student.
This way they know where to get their work and where to return it.
Make sure they keep their crates organized and when they are done for the day, the crates can be relocated somewhere out of the way.
When my boys would push their desks back at the end of the day they would put their crates underneath.
School Records and Proof of Mastery
During the year, I keep school records in a binder.
They include lesson plans, a record of grades, and any correspondence between me and my school district.
Then at the end of the year, I place these in a folder and put them in that year’s banker box.
If you take photos and videos for evaluations, then I suggest making an extra copy of these.
You can upload them to an external drive or even upload them to an online storage service like Google Photos or Dropbox.
Then place the hard copies in the banker box that corresponds to that school year.
For large pieces of artwork, store them in a thin portfolio so you can easily tuck them into a narrow space.
Creating an Interactive Resource Center
No matter what size your room is or especially if you don’t have a dedicated homeschool room, you can create an interactive resource center.
This is a portable and foldable solution that you can use in any setting.
Here are some pics of the resource centers that we created last year for the boys.
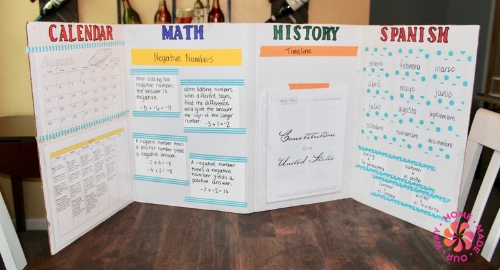
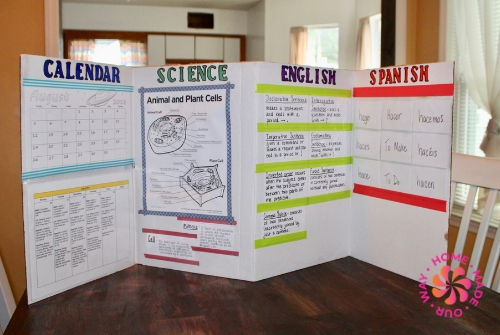
In a large classroom, this is great when you have children of varying grades.
While you teach one child, another can be working on activities provided on their boards.
They are also great for keeping distractions to a minimum and help when trying to section off a smaller homeschool room.
Naturally, if you don’t have a homeschool room, this is a perfect solution to whiteboards.
Items you would normally display on a whiteboard like spelling words for the week can be kept on here instead.
And the beauty of resource centers is that they are relatively cheap to make and you can actually create three centers out of one poster board.
I created two out of mine and they were still large.
If you’d like to create an interactive resource center like those above, click here and read my post on creating homework stations.
You’ll find the DIY at the end of the post.
More Suggestions for No-Room Homeschools
While you may prefer to have a room for homeschooling, your situation can actually make homeschooling less boring.
In fact, those with homeschool rooms can also use these tips to get kids moving around more often by taking advantage of the different rooms in and outside of your home.
For example, set up science classes and labs in your kitchen and even in a bathroom depending on the materials.
Having a sink nearby is practical.
If you have a workbench in your garage, this may be ideal for science and shop classes.
For nature studies, take it outside.
Let kids explore the outside world.
Smaller children can use their own bedroom or living room as a play area.
This really depends on where their toys are located.
Have a comfy queen or king-size bed?
Make it the reading room.
It’s where the boys and I go when we have group reading assignments.
The dining room or kitchen table may be ideal for writing assignments but it can get very boring if they are required to do all of their work there.
So vary it up as much as possible.
Final Thoughts on Setting Up the Best Homeschool Possible
So, before you start putting together your homeschool, let’s recap some things you can do to help set up yours.
- Measure out the room or space you are planning to use.
- See if you can divide the room (and even the home) into sections.
- Use spaces wisely by making use of every inch including vertical space.
- Keep only what you need and discard the rest.
- For no-room homeschools, use portable gear to hold your supplies.
- Do any necessary DIY to save space and money.
- At the end of your school day, make sure everything is returned to where they belong.
- Consider creating interactive resource centers.
Leave a Reply